 entrance
Programs for working with ISO images. How to create an ISO disk image or make it from folders and files
With the help of special programs. Creating a virtual image is a very important point when you do not have a CD / DVD recording disk using such images to play any game you do not need to have a disk, we will create emulation using the program, then mount it into the drive.
Today there is a huge number of programs for creating an ISO-image, many of them and good, and bad, but we will disassemble from course efficient and popular programs. Some of them are supplied free of charge and may not yield to paid versions, let's now see what programs are we talking about.
The program for creating an ISO disk image - CdBurnerXP
The CDBurnerXP utility is very powerful, it works with almost any images. Using it, you can, both write and overwrite the data, as well as erase them. The product is free, therefore, there are no restrictions. CdBurnerXP easily will create a virtual disk having an ISO extension. Works on all Windows operating systems. What do you need to create a disk image?
- Download CdBurnerXP here of this link. The site is official, you do not need to be afraid of viruses. When installing, closely follow all the buttons. One of them "More options"There you can turn off the installation of additional software, such as amigo, or Yandex browser. It is better to choose a portable version.
- Now that you installed the program, run it. In the window that opens, you will see many options. To create an ISO you need to choose an item "Creating ISO images, recording discs with data ...". If you want to create an image from the disk, you select "Copy Disk".
- So, a window will open in which you choose any files to create an image.
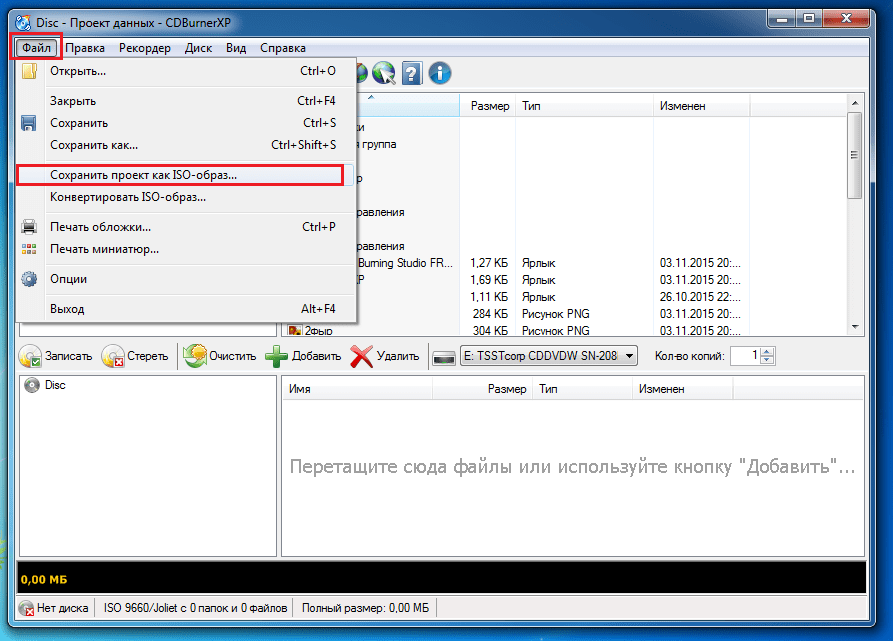
- Selecting files, you need to save our virtual image. To do this, click on the "File" button and select item. "Save the project as an ISO image".
Creating an ISO disk image using ImgBurn
The following program in our list is imgburn. She has a very understandable interface, so it is possible to figure out what and how, without my help, but I'll write everything just in case. To begin, I want to say that the installation file also carries the installation of undesirable software, therefore, when installing, keep track of all sorts of checkboxes and points. Here is the official website where you can download this program.

So, the imgburn utility is, of course, functional and has a simple interface. When you first install and start the program, you will see an interface in English, but you can change it into Russian in the settings. True, for this you need to first download the crack from the official site, and then throw the file to the Language folder.
To create a virtual image, you do not need much. It is only necessary to click on one of the icons provided in the main program window, add the necessary files and save the image.
The program for creating an image of ISO - Ultraiso
I do not want such a wonderful program as Ultraiso was last place. Yes, it is paid, but powerful, works with all kinds of images, a large number of files, can create virtual disks and record data on real optical discs.
The demo version of the program allows you to burn an image of 300 MB. Not really a lot. You can download with this site. If you need a full version, to write big files, you will have to or buy, or find the "Activation" on the Internet. A dishonest way, but you can try.
Creating an ISO image using ISO Workshop
Here is another program for creating virtual images - ISO Workshop. The interface is very simple, nothing superfluous. The program other than the ISO format can still work and C.Cue. This is a format that works with album images.
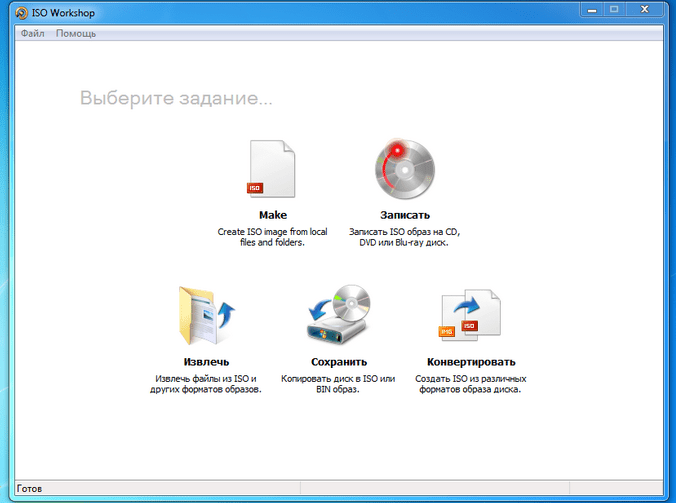
The program can and write images, and extract them, as well as check the disks for errors. Here is the official website of the program, download and use.

Program Ashampoo Burning Studio
And the last program in our list is Ashampoo Burning Studio. The program is free and with a pleasant interface. In addition to the ISO format, there are still many others. Works with almost any discs. If you decide to use this utility, you can write data to various discs using it, overwrite several times, copy discs. You can download the program from the official site. Noticed that basically I give only official sources? Some unfair people are trying to shove their products or give viral sources to steal your data. Before you download from dubious sites, it is better to study it more.
Once you have installed and launched the utility, you will see a pleasant window:

The program is in Russian, therefore, everything is clear. To create a disk image you need to hover the mouse cursor to the tab "Creating an image". Menu from 3 points will fall. First option - "Write an image" Allows you to write the data on the optical disk for this case. Second point "Create an image" Allows you to create an image from the disk already inserted into the drive.
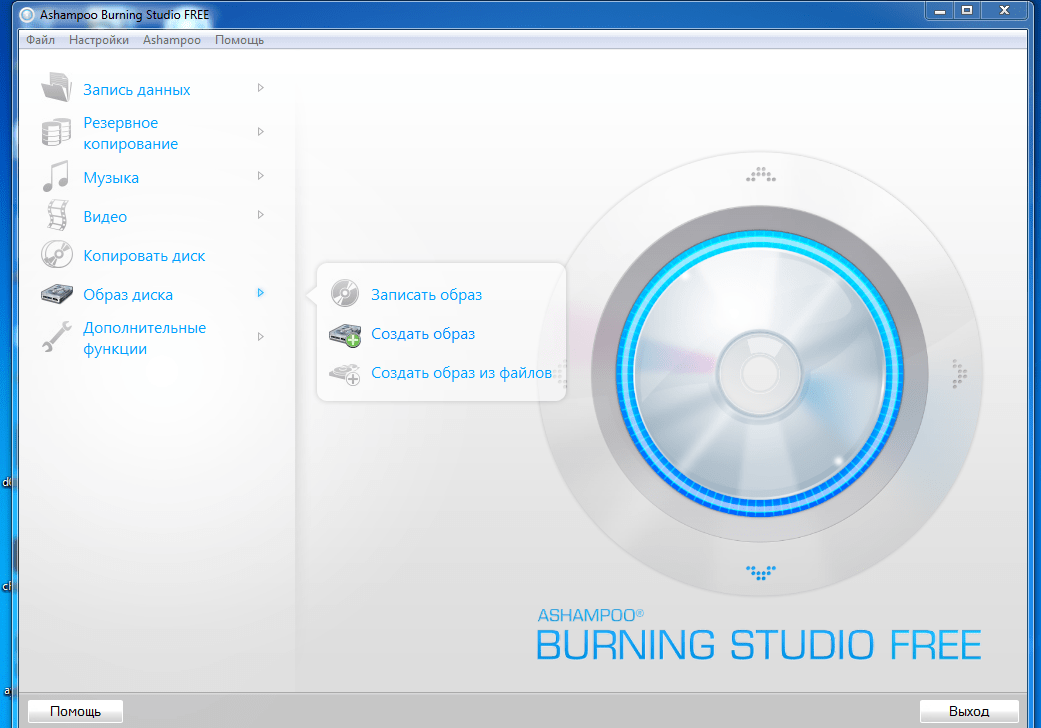
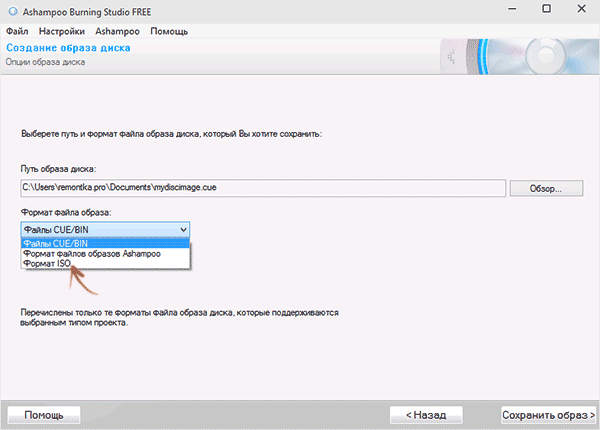
To create an ISO image from files, we need a third option - "Create an image from files". So we can make our own ISO images.
Suppose you have already chosen this item. Before our eyes will appear in which you need to select the ISO format. In addition to this format, there is still a native format of the program itself and the Cue / Bin format.
That's all, it's not all programs, there are a lot of them on the Internet, both well-known and just that appeared. Each has many advantages and disadvantages, but using the programs considered by us, you will easily create a virtual image and, if necessary, write down the necessary files to the finished disk.
Ultraiso - how to write an image on a USB flash drive in ultra iso
Ultraiso. (Ultra Iso) - One of the best programs to work with images of optical disks and record them on discs or flash drives in the Microsoft Windows operating system environment.
The main features of the Ultra ISO program:
- Create copies of physical CD / DVD disks in ISO format
- Create ISO images from files and folders
- Edit ISO files
- Convert ISO to other common formats
- Create boot CD / DVD
- Create and edit images of AudioCD disks
Installing the program is simple, and is accompanied by messages in Russian. No additional software installer installs.

Ultraiso - Installation of Program
During installation, you can remove or leave the Association of the C.ISO file program, set the drive CD / DVD emulator and create a shortcut to start the application on the desktop.
After installing the Ultraiso program, many have a question: how to use?
Very often, the Ultra ISO program is used to record the image of the boot disk on the USB flash drive or an external hard disk, for further booting from the USB drive. Therefore, we decided to show this process step by step accompanying every step with detailed images.
After launching Ultra ISO, a window will appear with a proposal to buy a program, enter the registration code or use the trial period.

Click on the "Test Period ..." key, the program will start.
Now you need to specify the disk image to write to the flash drive. Click on the "File" menu, and then "Open" or press the Ctrl + O keys simultaneously.

Ultra ISO - Opening Disc Image
In the dialog box that appears, select the path to the ISO file and the file you want to write on the Flash disk and click "Open"

Ultra ISO - Select ISO File
When the file opens, files and folders contained in the disk image will be visible at the top of the program and which will be written to USB media.

Ultraiso - disk image is open in the program
Now you need to record an open image of a CD on a USB drive.
To do this, you need to connect the appropriate volume to a computer or laptop to a computer, to write out the image, please note that all data contained on it will be destroyed, so if you have the need to pre-copy or move them.
When the flash drive or an external hard disk is connected, proceed to the recruited image.
Click on the menu item "Self-loading" and in the drop-down menu "Write a hard disk image that appears ..."

Ultraiso - Recording an image on a USB flash drive or an external hard drive
In the pop-up window that appears, you must select the disc to which the record will be made (if one external drive is connected, it will be selected by default), the "USB + HDD" recording method and press the "Write" key

Ultraiso - Setting the recording parameters

Ultraiso - Warning of data loss on the final carrier
Ultraiso will record an image of a flash drive, wait until the process status indicator reaches the final value.

Ultraiso - write disk image on the USB flash drive
After the post is completed, the message "Record is completed!"

Ultraiso - Record completed!
Now you can, close the program and remove the recorded drive.
Congratulations! You have just created a bootable USB flash drive using Ultraiso.
Finally, we want to remind you that the Ultraiso program is not free, but has a familiarization period during which all its functions are available. From alternative free programs, you can use utilities or presented on the relevant pages of our resource.
Hello! In this lesson, I will teach you to create disk images in ISO format. This feature can be useful in cases where any game or program does not start without a DVD or CD drive inserted into the drive.
I will also show how you can create an ISO disk image from various files that are simply lying on the computer. We can practice music, movies, programs and many other things.
In general, if you ended up on this page, most likely you know for what purposes you need create a disk image, so let's immediately proceed to business. To create an image, we will use ultraiso program, You can download on the official website.
And run it. Do not forget to insert a disk into the computer. Now we need to select the Tools menu and item "Create an image CD" in Ultraiso. You can also use the hot key. F8..

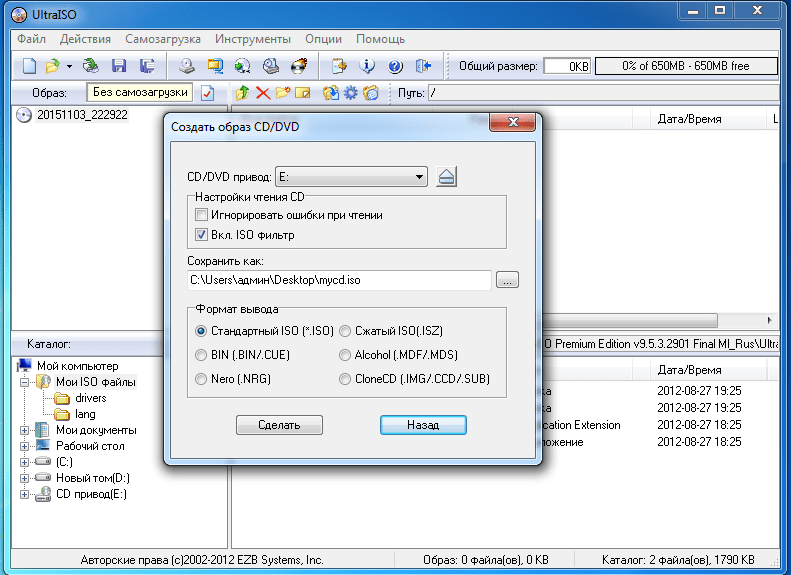
We offer a window where we need to configure something. First of all in the CD / DVD section you need choose drive letter, to find out which can be enrolled in the section A computer. If you have only one drive installed, the desired letter will be selected by default.

Low below, you need to specify the place on the computer where you need to save the ISO image, and also to give it a name.

Even below is the section to select format. Besides ISO. There is MDF, BIN and some other less popular formats. Perhaps in some cases they will be useful to you.

To proceed to creating an image, we can click the Make button.

That's how the process heads:

Here we once again see where the image will be saved, as well as the approximate time, which remains until the process is completed. At the end we can open the folder and check the result.

Now this ISO image can be opened in special programs, for example. After opening the image, in the section A computer This file will be displayed as a disc, and we can work with it as with conventional CD and DVDs.
Creating an image from various files
(films, music, programs, etc.)
Now I showed how create an image of iso From the real CD, which is inserted into an optical drive. But besides this, the Ultraiso program can pack in the disk image absolutely any files. It is done very simple.
The Ultraiso utility features allow you to record new information on CD / DVD and edit ISO files. You can also create bootable (and multi-load) discs and individual images for subsequent recording, convert from one format to another and compress ISO to ISZ.
The main screen is divided into 4 windows. The top two - display what is inside the selected disk, and the bottom - are designed to search and add files in the tree of the catalog. Copying and transfer occurs through a simple file transfer from one screen area to another (DRAG-N-DROP). When working with ready-made images, the utility will reserve an additional hard disk space (in the temporary storage folder TEMP).
The name of the program is associated with the international standard ISO 9660. It combines both ordinary CDs and DVD, and also ensures their compatibility with popular operating systems. But, of course, the case is not limited to one standard. There is support for the UDF file system, which is more oriented with DVD. Additionally, you can connect in the Rockridge extension settings (for storing attributes), Joliet (to withdraw restrictions on file names) and HFS (for compatibility with Mac OS). In addition to ISO, various formats of images are supported, including popular BIN, CUE and MDF.
An understandable interface, low weight and wide program functionality are 3 things that highlight it against similar tools. If it were not for the overestimated price and restrictions of the Shareware version, then Ultraiso could easily be in popularity, or.
Key features and functions
- support 45 formats in addition to the standard ISO;
- the ability to create hard disk images and multi-loading CDs;
- record data on CD / DVD;
- extract individual files and folders from the image;
- installing attributes for files and folders on the disk;
- convenient interface.
The most common problem, due to which users cannot open this file, is an incorrectly assigned program. To fix it in Windows, you need to right-click on the file, in the context menu, bring the mouse to "Open Using" item, and select the Select Program item drop-down menu. As a result, you will see a list of installed programs on your computer, and you can choose a suitable one. We also recommend checking the box opposite the item "Use this application for all ISO files".
Another problem with which our users also occur quite often - the ISO file is damaged. Such a situation may arise in cases of cases. For example: the file was downloaded not fully as a result of server error, the file was damaged initially, etc. To eliminate this problem, use one of the recommendations:
- Try finding the desired file in another source on the Internet. You may be lucky to find a more suitable version. Google search example: "File FileType: ISO". Just replace the word "file" to the name you need;
- Ask you to send you the source file again, it may have been damaged during transmission;