 entrance
Write a new VEGAS Pro sound. Editing Properties of Multi Track Video Files
I have already talked about the advantage of the Sony Vegas editor in working with sound. Everything is comprehensive in this publication in more detail, so I will not repeat.
As mentioned at the beginning of the article, Vegas was originally developed as a powerful multi-track sound editor. The possibilities for the processing of sound is very wide - the program allows you to:
- create projects, both with stereo sound and with the surrounding sound in format 5.1. Starting with the 8th version of Pro, the program supports sound in Dolby Digital format (AC3) 5.1 and inlet;
- write the sound from the audio card input (the recording is supported simultaneously with several sound cards, including multichannel);
- there is an unlimited number of sound clips on sound tracks, with different compression and formats (the number of channels and the sampling frequency) simultaneously in one project, without the need for pre-decompression of the sound (it is carried out "on the fly" during playback or output of the installation result in the final file) ;
- just as for video clips, set fadein / fadeout (attenuation) for sound clips, with the ability to choose one of the five forms of the attenuation profile (when you embed clips, 25 options for the transition of one clip in another by changing the volume of both) is obtained;
- turn on and off (Mute, drown out) Sound tracks.
- set the volume and stereo panorama (for projects with sound 5.1 - the position of the sound in space) for each track;
- assign the profiles (or envelopes, envelopes) changes in the volume / panorama in time with nodal points (for projects with sound 5.1 - the sound position profile in space);
- assign the effects chain to sound tracks for real-time sound pathways. Included there are several dozen effects: various filters, equalizers, compressors dynamic range, echo, etc. Also supported by any third-party DirectX and VST plugins for sound processing;
- for some effects, it allows you to assign profiles (envelopes) changes to the sound tracks in time;
- combine the audio tracks in the group (the so-called bus, or tires) to simultaneously control their volume, or assign the same set of effects on them;
- display sound into a variety of formats (including in MP3, AC3, and in the case of WAV and AVI formats - in any format for which the audio ACM codec is installed in the system).
In this article, it is impossible to consider in detail all the sound capabilities of the program, so we will dwell only on some, which are often used when installing the home video.
For example, you need to implement a simple action - replace part of sound in video. To do this, click the desired video clip with sound and ungrade it (press U) so that the sound and video edited separately. Suppose you need to replace the start of the sound to others - from the audio file. First, pull the left edge of the source sound clip to the right to make place under the sound being added. Then, in the Explorer section, find the desired audio file (for example, in MP3 format) and drag it to the mounting table, on a separate audio track. Correct the end of the added audio clip so that it has the desired duration. Then drag it to the same sound path where the original video of the video. It can be done so that it is partially imposed on the sound of the video deer - in this case, the sound will smoothly move from one clip to another:
If over the place of overlaying sounds (the so-called CrossFade), press the right mouse button, then to the submenu Fade Type. You can choose the shape of the envelope volume of each of the two sound clips - 25 options are available (the same as available for crossfade video clips). So that in the future video clips and both sounds move together, or accidentally unproved, they can be combined into a group - highlight them with a click with the Ctrl key and press G.
Often want add music to video. Even a rather boring and monotonous video can look different if you add music to it. This is very simple: find the desired sound file (for example, in MP3 format) in the Explorer section and pull it with the mouse on the mounting table just below the video outline of the video. A sound track will be automatically created, and the sound clip will be placed on it. If necessary, move the sound clip to the desired location, "Cut" its beginning / end, add fadein / fadeout, - all this is done in the same way as it is done with video clips (see "Installation Basics"). Naturally, in this way, any number of audio clips can be added to the project.
But just "throw" music into the project - only half. It is important to choose its volume correctly so that it does not sound obsessively and did not interfere with watching your video.
Be sure to try to see the result of the installation with listening to sound, both in headphones and in the columns, on different volume. If you want music to be only an additional background, and not replaced the original sound, it is important to choose the volume of music so that and with a small volume of columns, the source sound sounded clearly (in particular, in the voice of people in the frame should be clearly and choosing the words to perceive words ). Most likely, the volume of each musical composition will have to be selected separately. To do this, move the mouse cursor to the top edge of the sound clip (the cursor changes its shape to the hand with a finger and up-down arrows) and pull it down the left mouse button. In this case, the volume (GAIN, amplification) will decrease. Reducing the volume by 6 dB (decibel) means a decrease in the amplitude of the sound twice. Listen to at least a few seconds of the original sound with the music and make sure that the music does not sound too loud, and if it is not so, reduce its volume. Do it with each music clip, listening to different parts of the mounting project.
It may be that in some areas you only need to temporarily "muffle" the volume of music, so that only sounds in the frame at this moment are heard (for example, the voices of people), or, on the contrary, to give drama or dynamics of the plot music needs to be louder few seconds. To do this, you need to add volume change profile on the soundtrack with music.
To do this, select the desired audio track (click on the header on the left) and call the Insert / Audio Envelopes / Volume menu command. A horizontal line appears on the track - this is a profile, or enveling volume changes. In a place where you need to reduce the volume of the sound, right-click on the profile and call the Add Point menu command, and add another one. Then move to the place where the volume must return to its original value, and add two points of the profile and there. As a result, a horizontal section is formed between two midwives, which can be "pulled out" up-down to zoom in / reducing the sound volume in this area. The figure shows how to muffle the sound by 12 dB (four times in amplitude) on a plot for 10 seconds:

If you need to completely drown out the sound, the corresponding portion of the profile should be pulled down "to the stop" so that the volume accepted the value of -inf (minus infinity, which in decibels corresponds to the multiplication of amplitude at zero).
If it is necessary that the volume smoothly changed from some value to the other, add the volume point of the volume in the desired locations and set the desired gain values \u200b\u200bin them - either pulling the point-down / downpouse points, or calling the SET TO command ... in the menu on the right mouse button above the point. To create the source volume of the sound at any point (disable the volume change), select the SET TO 0.0 DB command.
Between points by default, the volume change profile is linear. In the menu above the profile section, you can choose the shape of the profile change curve -Linear,Fast,SlowSmoothSharp. A typeHold means that until the next point, the profile value will be constant.
The volume of each audio track can be changed entirely - for this, the ROL slider is used on the track header (if the slider is not visible, stretch the header in width):

It happens that the music added to the project, when the volume is reduced, sounds too quiet, and with an increase - too intrusive, with loud bass and annoying high frequencies, and find the "golden middle" is difficult. You can correct the situation with the sound equalizer. On the header of the soundtrack with music, press the TRACK FX ... button, a window for the assignment of sound effects (handlers) of the track will appear. Among them, the default TRACK EQ is immediately present - click on the name of the effect at the top to activate its window.
Equalizer allows you to change the sound volume in the right way in certain frequency bands, or stripes. By default, the equalizer does not change anything (all the gain parameters are set to 0 dB). Let's start with the lower frequencies (bass). Click on Bookmark 1 (Low Shelf Filter Type). Pull the left Gain slider to muffle the low frequencies. Pull the Frequency runner to the right to increase the frequency of the filter cut. The higher the frequency, the more low frequencies will be suppressed. You can run playback in the main window and listen to what is obtained by simultaneously selecting the frequency and the degree of suppression "on the fly".

Now you need to muffle high frequencies (there usually sound the upper sounds of shock tools, various noise effects, ringing, etc.). Click on the 4 tab (High Shelf Filter Type). Similarly, select the exhaust degree (GAIN) and the frequency of the cut (Frequency). The lower the frequency, the more high frequencies will be suppressed.
As a result, we have the following picture: low and high frequencies of music are plugged, and the music now sounds not so intrusive, without interfering with the perception of the main sound in the video.

Low frequency suppression can also be used to reduce the audibility of wind noise (more about this is written in FAQ).
It happens that the voices in the frame sound unintelligible. It can also be corrected using an equalizer - it suffices to increase the volume in the medium-sized domain (about 2-3 kHz for a male voice and 4-5 kHz for female). To do this, call the equalizer window on the sound track with sound from the video. Select Bookmark 3 (Filter Type Band) and increase the gain (GAIN), as well as change the center frequency (Frequency).

Run the project reproduction, and try "on the go" to choose the gain and the central frequency of the strip so that the voice sound more distinct. You can also increase the bandwidth (Bandwidth, in the octaves). It is not recommended too much (more than 6 dB) to increase the average frequency volume, otherwise the voice can sound "both from the phone". You can read more about this in the FAQ.
If the equalizer in the project needs to be processed not all the sound, but only its sites (for example, where there are speaking people in the frame), then all the sites that need to be processed, you need to leave on the sound track that the equalizer is appointed, and the remaining sound clips are transferred to A separate path on which sound processing effects are not assigned.
In addition to the equalizer, the TRACK COMPRESSOR effect is automatically assigned to the sound tracks, designed to reduce the dynamic sound track sounding range. It can be used to reduce the difference between loud and quiet sounds - for example, in plots, where along with quietly speaking people in the frame are sometimes there are loud blows, cotton doors, etc. Read more about how it can be done, you can read in the FAQ.

You can also assign the processing of the entire project with master buttons FX ... in the Mixer window. When you call the adding effect command, a window appears with a list of effects distributed by category. Select the desired effect, press the Add and OK buttons.
By analogy with the animation of the parameters of video effects (see above the corresponding section), you can set animation of the parameters of sound effects. For example, you can set a change profile in the time of the filter frequency of the equalizer. On the audio track header on which we assigned an equalizer to increase the voices, click the down arrow button on the right side of the Track FX button ... In the FX Automation drop out of the menu, select the FX Automation command, select the Trac EQ effect. The list shows the names of the processing parameters that can be made variable in the process of playback. Tick \u200b\u200bthe box Band 3 Frequency parameter (third band frequency) and click OK. A new profile will appear on the audio track, which can be controlled as well as a volume profile: add points, move them, set the frequency values \u200b\u200bat each point input value, etc.

Managing processing parameters during playback, you can get the most diverse sound effects - For example, using the Delay effect, you can get an echo with a changeable "reflection" time of sound.
4. Display output to the file
Saving the result of the installation in the output video file (not to be confused with the installation of the installation project) is carried out using the File / Render AS menu command ... In the File Type list, select the desired container format (for example, Video for windows For AVI file), in the TEMPLATE list, select Compression Format. Click the Custom button to view and / or set the video and audio compression settings (in the Project tab, do not forget to select Best in the Video Rendering Quality list - the quality of video save). If necessary, turn on / off the Include Video / Include Audio flags to enable / eliminate video and sound in the output file. In the Video Format drop-down list, the format (codec) is selected to compress the video, in the Audio Format list, the format (codec) is selected for the sound compression.
To be available arbitrary sound codec (format), you need to select a video format, different fromDV.
If the project uses the interleide (interlaced) video (and in most cases, it is so important for video from the camcorder), it is important that the correct order of fields in all source files is set (in the properties of the files in the Project Media window), and better the same order Install fields in the project properties, and in the output video settings to minimize the image transformations. If you want to save the unprocessed sections of the video without restraining, this requirement becomes mandatory (in this case, the size / frequency of frames should also be coincided, and for MPEG2 - and the compression parameters, in particular, bitrate).
For MPEG files (in MPEG2, HDV, AVCHD formats), the order of fields are specified directly in the source files, so the program determines the order of fields automatically (of course, if the specified order coincides with the actual - exclusion is rare, but happen when the file is incorporing the file; if the video is taken From the camera or the capture board, the order of fields in the file is correct).
In the case of AVI files, it is not possible to automatically determine the order of fields in the general case, but, for example, for the interleum video from the DV video camera, the correct order of fields is LOWER FIELD first (the first floor field). For a video captured by most TV tuners, the order of fields is usually reversed - Upper Field First (first field top). If the actual order of fields is unknown, or there is no confidence, it is possible to determine it using the method described in the FAQ.
If you want to save video in MPEG2 format for DVD, MainConcept MPEG Plug-in for Vegas must be installed and registered. AT recent versions Vegas To do this, install the Sony DVD Architect program. In this case, in the list of file types, you need to select MainConcept MPEG2, and the desired template is selected in the template list (for example, DVD PAL). If necessary, you need to adjust the video bitrate and / or sound, depending on how much the video should be placed on a DVD. For a length of one hour, one hour is usually enough single-pass coding with a stream of 8 Mbps for video (more about this is written in FAQ).
If a Sony DVD Architect is used as the DVD authoring program, then the Tags are set in the project (inserted by pressing Ctrl + M at the current position) can be used to indicate the starts of chapters (chapters) in the DVD created. When saving a file to MPEG2 format, turn on the "Save Project Markers In Media File" option in the file saving dialog, and the DVD Architect automatically uses the project labels as the start of the DVD heads (more precisely, the disc partition that will be from this MPEG2 file) .
Be prepared to save the resulting file can occur long enough (up to several tens of hours, depending on the duration of the project, video resolution, compression size and computer power). In case a significant part of the project persists without restoring, it is better source files keep on one hard disk, and keep the result to another, physically separate hDDTo significantly speed up the operation of copying data.
5. Coding with a frameServer
Sometimes there are situations where it is required to compress the result of the installation using an external program-encoder. This can be done by pre-maintaining the result in an AVI file without compression, or using the codec that allows you to save the data without loss. In both cases, a lot of disk space will be required: for example, in the case of a clock-time project, dozens of gigabytes will be needed to preserve it in the uncompressed format, and the saving will occur for a very long time. If the result is only needed to transfer it to encoding to another program, that is, the ability to avoid saving an intermediate file of such a large volume. For this there is a small free program-Frameserver Debugmode Frameserver, which can be downloaded from its official site http://www.debugmode.com.
After installing the frame server, run VEGAS, open the desired project and call the File / Render AS menu. In the File Types list, select DebugMode Frameserver.
If there is no in the list of formats of this type, try using the Council from the Forum.
When you click SAVE, specify the folder on the disk to save the intermediate file. After that, the frame server settings window will appear:

Parameters can be left by default, as shown in the figure. By pressing the button Next In the specified folder, an intermediate AVI file will be created (this will require some time) of a small volume. It can be opened in any program-encoder (Canopus Procoder, TMPGENC, etc.), and as soon as the encoding is running, the data for encoding will be transmitted to the encoder directly from VEGAS in uncompressed form, that is, without loss. This method of data transfer and is called frameworks when frames on request are transmitted directly from the mounting program to the encoder via memory, bypassing the record to the large-scale intermediate file. In addition to other amenities, this method allows you to carry out multi-passing coding using coders that support.
ATTENTION: Do not attempt to open the same intermediate AVI file immediately in several instances of the Coder program - the coding result will be unpredictable. The described frameserver does not have the correct support of such a mode, and is designed for sequential coding of the project (although multipart coding is allowed) only by one external process.
As soon as the encoding is completed, close the external program-encoder and click Stop.Serving In the DEBUGMODE FRAMERVER window.
Inserting sound in video - one of those processes faced by many users leading work on such projects. Perform it help special programsIn which the default is the ability to work with the paths of the image and sound. From the user only you need to choose the optimal solution to it and follow the instructions.
Next, we will consider three different software that allow you to cope with the goal. Each of them is focused on performing work of various complexity. This is talking about the general focus of software and the installed tools. We picked up representatives from different categories specifically to ensure that each user can find the method you need. Let's immediately proceed to the analysis of the manuals.
Method 1: Sony Vegas Pro
Sony Vegas. Pro is one of the most famous professional software that allows you to mount videos of different levels of complexity. We delivered this option to first place, since this decision is essentially reference. Sony Vegas provides great amount useful toolsthat you will not find in other solutions. However, for it will have to pay after familiarization with trial version. As for the insertion of music in video, it is done here like this:
- In order to impose music on video, you must first add video itself. To do this, drag the video file on the time scale, which is located at the bottom of the work area of \u200b\u200bthe program.
- So, the video is added. Similarly, transfer music to the program window. The audio file should be added as a separate audio track.
- If you want, you can turn off the original sound video. To do this, click the Disconnection button on the left. The audio track must be darked.
- It remains only to save the modified file - select Menu "File" > "Translate to ...".
- The video save window opens. Specify the required quality for the video file saved. For example, "SONY AVC / MVC" and setting "Internet 1280 × 720". You can also set the place of saving and the name of the video file.
- If you wish, you can customize the quality of the saved video in detail, in the same window clicking the button "CUSTOMIZE TEMPLATE". In the screenshot, all available options for editing are visible.
- It remains to click "Render", after which the saving will begin.
- The save process is shown in the form of a green strip. As soon as the saving is over, you will receive a video, on top of which your favorite music is imposed.


Method 2: Avidemux
Avidemux is a simple free program whose functionality is focused on recoding video with various changes. However, there is a function that allows you to insert one or more additional sound tracks into the roller, for example, deleting the original one. This option will suit those users who do not need to be played with the settings or reach some incredible effects - just adding sound support. The task is carried out as follows:
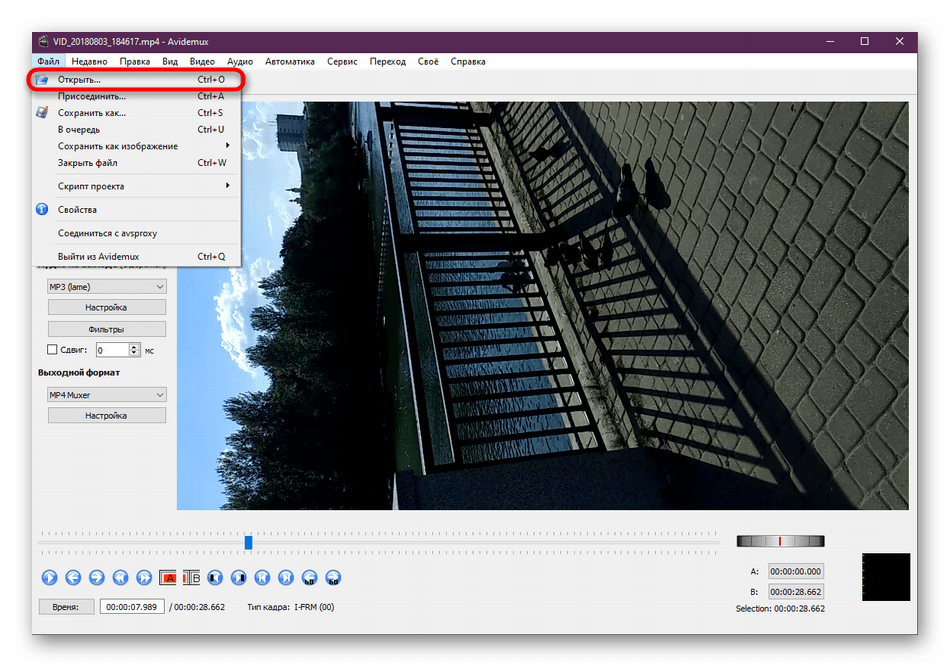
- Run Avidemux and through the menu "File" Go to the opening of the video.
- Through the conductor, specify the required object, double-clicking on it with the left mouse button.
- Now in the tab "Audio" Click on the string "Choose a track".
- Disconnect the main sound if it is present and it is required to do, removing the checkbox from the point "Enabled".
- Next, go to add a new track.
- Through "Conductor" Specify the appropriate track located on the hard disk or removable drive.
- In the case of adding subtitles the best option will indicate the language, as well as the path format.
- Pay attention to the section "Settings". The constant bit rate is set here and the quality of the audio is set, which will be reflected in the extent of the end file.
- In chapter "Filters" There are several useful additional parameterswhich can be useful to specific users.
- When you finish adding an audio, set an additional configuration through the decoder if necessary. You can simply leave all the default settings.
- Go to saving the video by clicking on the corresponding button on the panel from above.
- Specify the name of the roller, select the location of the save and run the process.
- The transformation operation will begin. Its duration directly depends on the size and quality of the finished project, as well as from the power of the computer and the priority.


After the processing is completed, play a record via any convenient player and make sure that the audio overlap was correct. Unfortunately, to do this through the preview in the Avidemux itself before conversion fails, as the program does not imply play sound, which is undoubtedly a fairly minus. However, in the case of the imposition of subtitles, the integration will be made to many popular video players, which will allow you to choose a sound track when playing.
Method 3: Movavi Video Editor
Movavi is actively developing the most diverse software To work with multimedia projects. In the product list, there is a video editor under the understandable name Movavi Video Editor. It is available for download it is free, but when playing the finished roller, an inscription appears that the file was created in this software. It will be disappeared only after the acquisition full version. Therefore, we propose first to familiarize yourself with the demonstration, to better deal with all the tools present here.
- Launch Movavi Video. Editor. You will be met by the starting window, where it will be prompted to use the Master of Clips or create new project. Let us consider in more detail the option that implies work with zero files. Click on "New project".
- Go to add files in the section "Import".
- In the browser that opens, select the desired video.
- In the same way, the audio support should be added.
- Click on the audio track video to open the section with its settings. Remove or reduce the volume if required.
- Exactly the same click on the added composition, in order to edit its speed, volume, appearance and disappearance.
- In addition, the built-in functionality of Movavi Video Editor includes ready-made libraries with different music that downloads from the official site and is free to use. If necessary, you can add such a track.
- Check your results by running playback through the preview window.
- Then it remains only to save the video on the computer or immediately download it on YouTube, Vimeo or Google Disc.


Of course, the Movavi Video Editor developers do not push their product as a professional tool to work with similar projects, but the built-in tools are enough to create a very good job or simply quickly impose a sound track on video. As you can see, this is completely simple, and the friendly interface will not deliver problems with understanding the interaction.
The algorithm of action of another similar to practically nothing is different, except that the principle of operation of some functions will be somewhat different, so you can safely use other solutions, pushing out the instructions seen. You will find them in a separate review on our website by clicking on the link below.
As part of this material, you learned about the three available music insertion methods in the video. All of them are like something, but the programs used are aimed at different categories of users and provide certain tools. Therefore, we advise you to get acquainted with all the options, and only then go to the implementation of the task.
Sony Vegas. - Product from Sony. The program is designed for multiple recording, editing and editing video and audio streams.

Using Sony Vegas and its built-in video file support, editing and processing of formats are possible: DV, AVCHD, HDV, SD / HD-SDI. It is also possible to create volumetric sound and two-layer DVDs. In order to save entries in high quality, Blu-ray discs burn straight with timeline. Creating standard DVDs with a complex video will not be difficult. Using Sony Vegas, you can scan, pan and cut great images to create a movie.
On the forums of this program, as well as on the company's website, you can get different tips on using the program.

How to replace sound in video in Sony Vegas?
We will analyze the easiest way to work Sony Vegas - we will replace the sound in the video.
1) To begin with, open the Sony Vegas program itself. Now we need video audio files that we will edit. Import them. To do this, click File-> Open, choose the video you need and click on it. As a result, it will appear already on timeline. It is also worth noting that the file can be directly dragged from the Windows Explorer directly to the timeline.

2) Now replace a piece of audio from the source video to your. To do this, you can use in several ways, consider one of them. We highlight the audio track by simply clicking on it. Put a marker on timeline at the beginning of the desired fragment, click S. And, accordingly, at the end of the video fragment, similarly click S.. Next, in the marked area, click right-click and in the drop-down menu click " Group" -> "Delete from".
Cost to note that if this is not done, but immediately press Delete.The audio and video fragment will be deleted. Now we go back to the audio fragment marked and remove it. Next, we find the desired audio file and drag it to the right place.
3) in order to add smooth transitions From one audio fragment to another, it is necessary to pull the audio behind the edges as shown by the example.
4) To speed up or slow the playback of the audio file, you must hold the key Ctrl And pull the audio behind the edges, stretching it.
how insert music in video with Sony Vegas.

Probably many interested questions: how can you put music on the video? From this article you will learn how to do this using the program Sony. Vegas.
Installing Sony. Vegas
Download the installation file. Install the program, following the annotation. You can simply press the "Next" button. Installation options for deflot are fully suitable for most user.

After the program is installed, run Sony Vegas.
how insert music In the video with Sony Vegas
The main screen of the application looks followed.

In order to impose music on the video, you need to first add video to you first. Hello everyone! We continue to study the video editing unit, and today I will show you how to insert the text in Sony Vegas about 13 on top of the video or pictures. To do this, drag the video file on the time scale, which is located at the bottom of the workspace program.

So, the video is added. How in Sony Vegas insert video in video video ::. How to add an effect in Sony Vegas? 1. How to change the voice in Sony pseudonym Albanian 2 season 13 How to change the voice in Sony Vegas)). First of all, download a video recording in Sony Vegas to which you want to impose an effect. Similarly, transfer music to the program window. The audio file should be added as a separate audio track.

If you wish, you can turn off the unique video sound. To do this, click the Disconnection button on the left. The audio track must be darked.


The video save window opens. How to insert text over the video in I make a movie in Sony Vegas 13 and I need to do. Disquire the required quality for the video file saved. For example, Sony AVC / MVC and the "Internet 1280 × 720" setting. Lesson # 2 How to insert music under the video in Sony Vegas Pro 13. How to insert the text in Sony Vegas about 13 on top of the video. Here you can also set the place of saving and the name of the video file.
Lesson number 2 How to insert music under the video in Sony Vegas Pro 13
Open the description ??????.
How to add music to video with Sony Vegas. Pro 13.
Fewing ordinary overlay method music On the video !!!

If you wish, you can configure the quality of the saved video in detail. As in Sony Vegas to connect two videos at 02/15/2016 at 1:49 pm Inscriptions "Paste" no or she. To do this, press the "Customize Template" button.
Similar articles

It remains to press the "Render" button, after that the saving will begin.

The process of saving is shown in the form of a greenish strip. How saving will be completed, you will receive a video, on top of which your beloved music is imposed.

Now you understand how you can add your beloved music in the video.
Will this article help you?
More articles on this topic:
Thanks for the manual but I reread a couple of times to realize how to add a background music. Not the first time, but I did it. Previously, I simply mounted intro without sound, and now thanks to you, at least somehow diversified him.
You are welcome. How to add an effect in Sony How to add an effect in Sony Vegas Pro 13 Intro in Sony Vegas. How to make a cool text animation in Sony Vegas 13? (Tutorial) Animation and design of text and titers Sony Vegas # removalimontize #Sonyvegas How to make an animated text in Sony Vegas about 11. We are always happy to help, and try only for you.
Ask a question or leave your opinion source Cancel Comment
Change ID in TeamViewer everything turned out, but due to the change of the MAC address, the license of 1C was delayed. So, before making all the above actions, you should make sure that it is possible to restore the license 1c
Hello, dear friends!
Today's my small article is devoted to how from video to extract (cut) an audio file in the Sony Vegas program. In other words - save sound separate from video.
Cases why it happens, I think it is not worth describing. Otherwise, you would not be on this page, right? ..;)
To the case, ladies and gentlemen!
So, in order to keep the sound from the video, we:
1. Actually, open this video in Sony Vegas.

3. After that, we go to the menu item "File" , Further " RenderAs"And in the window that opens:
- - specify the folder where to save our audio file;
- - in field " Filename.»We introduce its name;
- - And in the field " Save.astype»From the drop-down list, choose the version of the audio format you need so that the output is the sound file, and not the video. For example, I will choose MP3 format:

4.
Well, now it remains only to click " Save.».
Everything! Now only waiting for the end of the miscalculation of our audio file. After that, you can find it in the folder indicated before saving. Well, I congratulate you!
Save. Listen. Enjoy!
I suggest you also watch a video about how to save audio tracks from the video in Sony Vegas Pro 13:
Well, now everything is exactly. Successes in creativity and work! ;)
Your Viktoria.