 entrance
Installing catalyst control center windows 7. AMD Catalyst installer: incorrect driver recognition
One of our readers asked for advice, and the editors of Tom "s Hardware found a very unusual problem. At first glance it seems unlikely to be serious, but the frequency of its occurrence is still somewhat annoying. After browsing several forums on the Internet about this problem, we came to the conclusion that it is not private to our reader. This fueled interest in the question, especially since we did not find any reasonable explanation for the problem. The problem itself is that the Device Manager and Catalyst Installation Manager cannot agree whether the northbridge driver is installed or not.
The reader has already contacted AMD support, but since the computer was working without any obvious problems, the reply was that everything should be fine. But this answer did not satisfy the reader - and neither did we. We deliberately went through the process of installing Catalyst drivers on three different Windows 7 systems, and were able to repeat the problem in all cases. In the end, it turned out that our reader was right.
The problem manifests itself in the following circumstances.
- Windows 7 (x64, x86);
- motherboard based on AMD chipset;
- drivers from Catalyst 10.2 to 10.5 (the latest version at the time of tests);
- Installation in Custom mode (not in Express mode).
We hope this article will be helpful, as an old but very effective trick, which we will talk about a little later, turned out to be a solution to the problem. In addition, it has the potential to eliminate other pitfalls that may arise when installing AMD / ATI drivers. We'll also take a quick look at a hidden option in the Catalyst installer that can be useful too.
To eliminate all possible sources of error, we used a "clean" Windows installation 7 with no drivers or updates installed, except for updates to Windows 7 itself.
In the Device Manager in the System / System devices section, we selected the "AMD PCI Express (3GIO) Driver" item, in which we found the atipcie.sys (x86) or atipcie64.sys (x64) files. These drivers are installed by default. We wrote down the version of the installed drivers before further installation.

Then we unpacked the current version of Catalyst drivers (at the time of the tests) into the directory we specified, after which we launched the installation, leaving it at the initial stage, where the choice of installing or uninstalling the drivers is made.

We selected "Uninstall" followed by "Custom Uninstall" to get a list of the components that the installer recognizes. And the result confirmed the problem we identified earlier: Catalyst installer did not recognize any installed components, although the driver was already installed by Windows 7 and updated via Windows Update.

After restarting the installation, we selected "Installation" followed by "Custom Installation".

In addition to the USB drivers, we now have the option to install the Northbridge drivers. Interestingly, the suggested version was the same as the one already installed. We chose to install the drivers anyway to avoid confusion. The installation completed successfully.


After the required reboot, we reopened the Catalyst installer to check what options appear in the driver uninstallation section. With the exception of USB drivers, we found no other options. Then we ran the installer again to install the drivers, after which we found out that the driver is offered to be installed again, that is, it does not say anything about the fact that it is already installed!

Even though this problem can only be detected in the Custom / Custom installation mode (in Express / Fast mode, very little information is displayed about the installation process), we were puzzled. Well, let's find the cause and present a possible solution.
Possible reasons
After some experimentation and straightforward removal (with the Cleaner utility and manual deletion of registry entries), we came to the conclusion that the installer AMD Catalyst and drivers obtained through a Windows installation and / or Windows Update do not interact with each other. Although manual driver installation and removal via Device Manager works fine, the Catalyst installer "forgets" the installed driver, prompting you to reinstall already installed drivers that are not exclusively supplied by AMD (that is, they are already offered by Microsoft).
At the same time, the opposite scenario is not possible, since the drivers are not detected by the installer during installation or removal. In principle, only AMD can answer whether this is a consequence of a security mechanism or an installer error in determining the drivers.
But we would like to note once again that the identified problem does not lead to any computer failures. It can be called an annoying oversight that is confusing for those users who regularly monitor driver versions so that the computer always runs with the latest drivers. But our little research showed that this situation has existed for quite a long time, and so far there has been no explanation or fix from AMD.
The Catalyst installer begins by extracting files to the specified directory. We need it to perform the trick.

We went to the directory with the unpacked files, after which we selected the "Config" subdirectory. It contains the "InstallManager.cfg" file. We opened it with a suitable text editor Notepad / Notepad. The contents of the file are shown below.

Pay attention to the item "WorkaroundInstall". By default, it is set to "false". We activated the item by setting the value to "true" and then saved the file.

We then ran the installation from the directory by executing the Setup.exe file. Pay attention to the installation options we agreed with.

The situation, as you can see, has changed: now, after running the Catalyst installer, only exclusive AMD driver packages are saved.
Additional benefits
This trick also helps in situations where the Catalyst installer refuses to install the driver for some reason, despite the hardware being connected and the old driver working perfectly. So if the next time you encounter an incomprehensible installation problem, then remember that the modification installation file can work a miracle. We used a similar trick when the current version of Catalyst 10.5 refused to install on systems with 10.2 or 10.3 already installed.
As we described just above, we went to the directory with unpacked files. Then to the "Config" directory, then opened "InstallManager.cfg" in Notepad / Notepad. However, in this file we also found a "Show Update" item at the bottom. By default, it is set to "false". We activated this item by setting the value to "true" and then saved the file.

Then after starting the installer, a new option appears.

If you select the "Update" option, which was previously hidden, a new wizard will start.
Here you can update individual components without having to remove them. As we understand it, the Installation option performs only limited or no uninstallation procedures, while the Update option combines complete uninstallation and installation of the selected components in the same reboot cycle. This saves on one reboot cycle that is required when complete removal drivers. Also, this step is useful after removing the drivers and rebooting, since Windows can automatically replace the removed drivers against your will.
If you are a Catalyst driver user, take it easy when you identify a problem. It may seem strange at first, but this problem will not lead to serious crashes. In addition, if you know some tricks, you can solve many similar problems easier and easier than you might think at first.

Manual editing config file Catalyst can help solve similar problems to the one we described. In this article, we have detailed the steps that will help inexperienced users. Perhaps AMD will react somehow. The more functions a software package contains, the more complex it becomes. And mistakes will inevitably arise. The real question is how quickly errors will be identified and corrected. All this should be taken into account when filing complaints.
Catalyst Control Center is software released by AMD for the management and configuration of graphics cards (AMD brand only). This software is a single control center, which does not require additional work programs, and includes all the necessary tools.
The Catalyst Control Center program allows you to fine-tune the parameters of the video card, monitors driver updates, which it downloads and installs automatically from the official AMD website. If you are the owner of an AMD video card, then you just need to download this program to properly tune and increase the performance of your graphics card for comfortable work.
Unfortunately, this software has ceased to be released and supported. AMD released a major update to the Catalyst Omega drivers in December 2014, and almost a year later decided to permanently ditch the brand it had used for thirteen years. Thus, the Catalyst Control Center program is no longer supported since 2015, it was replaced by the new Radeon Software Crimson Edition, which is relevant to this day and has a set of the latest drivers with more advanced functionality.
Many people continue to use Catalyst Control Center to configure their video cards, as this program has a very simple and intuitive interface with all the necessary set of tools.
Main functionality:
- Performance tuning.
- Desktop management.
- Performance tuning for working and watching video clips.
- Configuring switching between two GPUs.
- Performance tuning in games.
- Video card power management.
- Updating drivers.
- Notification of innovations in updated drivers.
- General information about the video card.
- CPU frequency control.
- Manage and configure the operation of more than one monitor.
Due to the constant updating of drivers for its video cards by AMD, it was necessary to adjust the parameters of its video card for optimal and maximum performance with different programs and games, just for this you will need the Catalyst Control Center program.
This software can help you even if you have a rather old video card, the program will help you to properly configure the video card and achieve optimal performance with programs and slightly increase the FPS in games.
This application independently monitors all changes in the updated video card drivers and notifies the user about it.
Also Catalyst Control Center will help you in connecting and configuring 2 or more monitors to one or more video cards.
You may have come across the fact that the monitor is dull and does not reproduce colors and contrast of very high quality, using this program you can adjust these parameters yourself, bypassing the standard monitor settings.
Having understood the whole meaning and functionality of the Catalyst Control Center program, you can clearly understand that if you own a computer or laptop based on the AMD platform, you just need to install this application in order to use it in configuring and controlling your computer or video card.
Installation
First, we need to download this software from the official website, for this we follow the link:
https://support.amd.com/en-us/kb-articles/Pages/latest-catalyst-windows-beta.aspx#
In the window that opens, click on the link that corresponds to the version and bitness of your operating system, after which the installation package will be downloaded. This software is suitable for operating theaters Windows systems 7/8 / 8.1 / 10 with X64 and x32 bit depth.
After you have downloaded the Catalyst Control Center, launch the installer and go through all the installation steps, when choosing the installation type, select " Fast installation”, With this option, the installer will check if the drivers for your video card are installed and will install the Catalyst Control Center software itself. 
After the installation is complete, restart your computer and launch the program.
When you first start the program, it can take a long time to launch, so we have to be patient and wait. 
This completes the installation of the Catalyst Control Center software.
Check for updated video card drivers
Catalyst Control Center independently monitors driver updates for your video card. In order to check the update and driver version, go to the "Information" menu and select the "Software update" item. 
In the tab that opens, click "Check for Updates". In the event that an updated driver is found, a window will appear in the offer to download from, click the "Download now" button and the program will automatically download and install them. 
Performance tuning to suit your requirements
The first thing to do when you first start is to change the standard view of the window to extended. This can be done in the "Options" menu, which is located in the upper right corner. In the drop-down menu, select the "Extended view" option.
Thus, all the configuration tools in this program will become available to us.
It is worth remembering that if you are using a computer that is completely built on the AMD platform, then you must have 2 graphics cores, integrated (integrated video core in the processor) and discrete (video card). In this case, when configuring the system through the Catalyst Control Center program, the parameters marked "Energy-saving" will refer to the video core built into the processor, and all parameters marked "High-performance" will be applied to the discrete graphics card that is connected to the PCI express slot. 
Setting for viewing videos and photos
In order to adjust the operation and color rendering of your video card when watching movies, you need to open the "Video" section and go to the "Color (energy-saving graphics adapters)" tab, check the settings in the "Custom" section.
After that, using the tools, adjust the picture to those parameters that you like the most.
Next, in the "Video" menu, select the next tab "Quality (energy-saving graphics adapters)". In this window, we remove all the jackdaws, from all items, except for "Deinterlacing", so as not to overload the GPU and increase the number of FPS when watching high-quality 2K and 4K videos.
The next step in configuring your video and photo viewing options is the AMD Steady Video section in the Video menu. This function allows you to stabilize shaky videos that are moving. This option will reduce the degree of video shake for comfortable viewing, but also overload the graphics adapter, so I advise you to deactivate this option if your video card is low-powered. 
As for the sections "Color (High-performance graphics adapters)" and "Quality (High-performance graphics adapters)" we set the parameters by analogy.
And at the end of the settings for viewing videos and photos in the "Accelerated video conversion" section, check the "Enable hardware acceleration" checkbox. This parameter will unload the GPU when playing high-format videos, or when editing and creating videos through special programs.
Setting up for games
In order to adjust the performance of your video card in games, you need to go to the "Games" menu and adjust the 3D graphics settings in applications one by one. To do this, we need to open the sections "Settings for 3D applications (Energy-saving graphics adapters)" and "Settings for 3D applications (High-performance graphics adapters)" different models video cards.
It is worth noting the section "AMD Radeon Dual Graphics", this option was developed by AMD specialists and, provided that your computer is based on the AMD platform, allows you to enable multiple GPUs to work together in order to improve the quality and performance of graphics. I advise you to include this function, as it significantly increases the performance of the video card in games and applications that require accelerated graphics processing. 
System performance tuning
In order to tune the performance of the entire system, we need to open the "Performance" menu and select the "CPU Power" item. If you are using a computer, then we set the processor frequency to the maximum value. In the event that you are the owner of an AMD-based laptop, then it is worth a more subtle approach to this setting, since we will have access to 2 parameters for adjusting the processor frequency.
- From battery. This parameter should be adjusted taking into account that when the maximum parameter is set, the battery discharge rate will increase, since the processor will consume more power. Therefore, if you want to extend the battery life of the laptop, do not set the maximum value.
- Connected. This parameter can be set to the maximum value to increase the performance of the central processor, in the event that your laptop is connected to the network and does not use battery resources.
Switching between these modes is automatic. Please note that the processor temperature may increase with these settings. 
With regard to the AMD OverDrive item, this setting allows the Catalyst Control Center software to independently explore all overclocking options for your CPU and take the most suitable ones to increase performance. Also, in some versions of AMD OverDrive drivers, it allows you to control the rotational speed of the coolers of a video card or laptop. I advise you to disable this option and manually configure these parameters in the above section "CPU Power".
Power settings
In this section, you can fine-tune the power settings for laptops, namely, power consumption when using the laptop from the mains or on battery power. If you own a computer, then I advise you to set such parameters as "PowerPlay", "Global settings for switchable graphics" to "Maximum performance". By choosing these parameters, the system will not save energy.
If you own discrete and integrated graphics of the same AMD brand, then when you use the "Maximum Performance" option, the system will always play graphics from the discrete graphics card. In the event that you select a different parameter, then the system will switch between two video cards to save energy, which may adversely affect the performance in games, but increase the battery life.
Let's take a closer look at the "Switchable Graphics Settings" item. In this section, you can configure specific performance parameters and the use of the desired graphics core separately for each installed application on your computer. Thus, for games or applications that play high-definition video, you can set the "high-performance" parameters, and for applications that do not require good graphics processing, and in order not to unnecessarily load the system, you can set the "Power Saving" parameter, which will tell the system to use for these applications have a built-in video chip. 
When using the Application Monitor feature located under Switchable Graphics Application Monitor, you will be able to install automatic switching graphics adapters between applications.
We examined the parameters in which it is possible to tune the performance of your video card to the maximum value. As for the rest of the sections, this will be briefly described below, since their settings will not affect system performance.

Reasons and solutions for Catalyst Control Center not starting
There can be several reasons why Catalyst Control Center has stopped starting. Consider common causes and methods of solving them.
Outdated drivers. One of the reasons that the program has stopped starting may be outdated drivers, as a result of which there is a conflict between the Catalyst Control Center and the video card drivers and the launch cannot be carried out. The solution to this problem may be updating the drivers, for this go to the official AMD website and install the latest drivers for your video card.
Incompatibility. The same reason that the launch does not occur may be wrong installed version Catalyst Control Center software.
The solution to this problem is to uninstall and install the correct software that suits your operating system... To do this, check the bitness and version of your Windows OS, then go to the official website and download the version that suits you.
Antivirus programs. The reason may also be the blocking of Catalyst Control Center by antivirus programs.
The solution to this problem may be to temporarily disable your antivirus software, or to add Catalyst Control Center to the exclusion list.
Damage to program files. Perhaps you deleted some files in the Catalyst Control Center program directory by mistake, or did it for you. antivirus program... Also, do not discard the option that sector of hard discs have been damaged.
The solution for this cause might be a complete uninstallation and reinstallation of the software.
If the startup problem is not resolved, and the error "Cannot start AMD Catalyst Control Center at the moment" remains, then you should update all drivers in your Windows OS.
How to uninstall this software
To remove AMD Catalyst Control Center, you should use standard means Windows.
To do this, open the control panel. To open the control panel, press the key combination Win + R and in the "Run" line that opens, enter the command "control". 
In the control panel window that opens, click on the item "Uninstall the program". 
Find the Catalyst Control Center program, right-click on it and select the "Change" item in the drop-down menu. 
In the installation wizard that opens, select "Quick removal of ALL AMD software components" and click next. 
We are waiting for the uninstallation to complete, and then restart the computer.
Conclusion
By reading this article, you are familiar with AMD Software, the AMD Catalyst Control Center. With this program, you can make the most of your graphics card settings to improve performance in games or when watching high-format videos and movies. The big plus of this program is the ability to customize the system using more than one GPU.
As of today, AMD Catalyst Control Center is no longer supported by AMD as it was released new program Radeon Software Crimson Edition, which brings new features and customization tools. But even after that, many continue to use it, since it has a very convenient and intuitive interface with a set of all the necessary tools.
If you are the owner of an old AMD graphics card and want to run applications that require high graphics processing, then you should resort to adjusting the video card steam meters via the AMD Catalyst Control Center to improve performance.
Good day, ladies and gentlemen, friends, readers and other personalities! Let's try today configure the video card.
We have already talked a lot about drivers, ranging from that, and ending with all sorts, and all sorts of other differences. Today we will continue this topic and talk about more detailed settings.
It's about picking driver settings using the example of AMD Radeon (ATI) video cards using the utility built into them. Here we will not talk about temperatures (because they talked about), overclocking the video card (because they talked about) and the rotation speed of the fans (because they also talked about), but we will consider the functionality of the software that comes with the kit and a bunch of all sorts of settings (which , including, are found in games-applications).
By the way, even if you have a card not from this manufacturer, you should read the article in order to know and, by analogy, be able to configure all sorts of anisotropic filtering, anti-aliasing, morphological sampling and filtering, triple buffering and much more.
So, the key to the start, moved.
Introductory verbiage
Attention ! Hereinafter, part of the meaningless (water) text, when the article was updated, was retained insofar as there is a lot of it and there is no desire to completely rewrite (or delete) for various reasons, and the original author had a different text. Please bear this in mind. Otherwise, the content to help you (it is clickable).
I think I’m not deceiving if I assume that many who read the site "" of the project, no, no, and they sin in their free minute to sit down at their favorite igrulyu in order to plunge into the colorful world of virtual reality.
But this is not a task, our Wishlist (hardware under the hood of a PC) does not always coincide with system requirements newly released toys. And you still want to play poker, and not anyhow, but so that something even moves and speaks on the screen, and does not slow down and lag. What to do in this situation?
Not to buy with every release of a modern toy a new filling for your computer, and, in particular, as the most important component of modern video games? I don’t know about you, but I have no desire to give my hard-earned money in just 1-2 hours of virtual pleasure a week.
At first glance, it may seem that there is no way out, except for throwing money into hardware, but it is, moreover, it is very free and quite effective and it is called - setting up video card drivers for maximum performance... From you, as a user, only straight hands are required :) and this note.
So, gentlemen, let's get down to squeezing all the juices out of our vidyahya, by setting up its hardware. First of all, I would like to say that this particular article will be devoted to users who have a video card from AMD under the hood of their PC, i.e. radio operators. However, those readers who have given their vote to NVIDIA's piggy bank should also not worry, we will prepare an even more delicious article for you.
Actually, let's get to the point.
Introductory topic and article
Due to the fact that the article is periodically updated and kept up to date (as far as possible), but not completely rewritten, here you can find two versions of the described drivers and settings for.

One of them is talking about "old" drivers for the corresponding cards and software, as well as for the internal layer and interface (sometimes you can dial up to it on certain systems, types of drivers, etc.), that is, we are talking about which you can see on above.
The second version (under a different subtitle) describes the visual and logical appearance more new version, namely AMD Radeon Software (aka, in different periods of time, - Crimson, Crimson Relive, etc., etc.). You can see it below (clickable):

One way or another, regardless of the type of software used (and both the first and the second, this is just the driver's environment), settings (they mean the same samples, shader cache memory, anisotropic filtering and much more), according to their semantic content , are similar and they play a key role.
Therefore, the latter are placed in a separate subheading, the content after which is the most general (including for all video cards) and relevant.
Settings of video card drivers separately from versions and interfaces
What you need to understand here (and further) before setting up:
- If you cannot determine the difference by eye, then you do not need to set the maximum value for anything or look for which one is better, etc. and so on, because these will be letters for letters, numbers for numbers, and so on;
- If everything works quickly and you do not meet corners and irregularities, then you simply do not need any higher values;
- If everything works slowly, then even then and only then is it worth picking out the settings, methods, degrees and methods;
- What is slow and fast, corners and roughness, everyone determines for himself, because it depends on the resolution of the monitor, the speed of its response, application and subjective feelings (for some, "ladders" seem to be the norm, for others, on the contrary, 16X MSAA is not enough).
Now about the settings themselves.
Anti-aliasing mode
determines the levels, degree and method of smoothing surfaces in 3D applications:
- Eliminates ladders (corners) on screens for various models;
- A driver (not in an application) usually has three global meanings: use application settings, improve them, or override;
- When redefined and improved, it allows you to select the degree of anti-aliasing (2X, 4X, 8X, etc., etc., in particular values like 2xEQ, etc.) on which the quality and performance directly depend (stronger anti-aliasing -> requires more resources ->
- In the applications themselves (not the driver), often (for some time now) you can choose a method (type, option, method, call it what you want), - SSAA, MSAA, CSAA, NFAA, FXAA, DLAA, MLAA, SMAA, TXAA etc;
- The difference in degrees and methods is quickly and easily found in search engines (it is better to immediately search for pictures) or you can determine by eye in a particular application.
Anti-aliasing method
Defines the method (technology, type, variant, method, call it what you want), which is used for anti-aliasing:
- Conventionally, it has three gradations (in the driver settings) - multiple sampling, adaptive sampling, oversampling (the application settings are described above);
- The quality and performance directly depend on the method (anti-aliasing is stronger -> it requires more resources -> if they are not enough, then the performance is lower);
- It is recommended to use the adaptive option, change it in case of performance problems and / or insufficient anti-aliasing when using degrees smoothing.
Morphological (not to be confused with anisotropic) filtering
An additional method of smoothing and filtering the image. "Little known", rarely used, redundant:
- In theory, should improve image quality, but in practice often negatively impacts performance at the cost of questionable anti-aliasing improvements;
- Very crookedly speaking, it is engaged not so much in anti-aliasing, but in blurring the final image and its additional filtering, after applying the methods described above, for a more complete understanding (I'm not sure if you need it), you can try reading (English);
- For the above reasons, as well as in connection with often, rather, negative consequences (loss, brakes, etc.), it is worth leaving it off (in fact, it has two positions (on-off).
Anisotropic filtering mode
Improves the quality of textures and images in general by filtering texture images on surfaces that are strongly (and not very) tilted relative to the camera:
- A driver (not in an application) usually has two global meanings: use application settings or override;
- As in the case of anti-aliasing, there can be 2X, 4X, 8X, etc., which determines the quality of the filtering;
- The principle is based on using several copies of the same texture with different details and building the number of texels (the minimum texture unit of a three-dimensional object, if you like, a texture pixel) along the viewing direction and averaging their color. Loads video memory heavily (requires high bandwidth, which in turn is determined);
- Since certain years (from about 2007), it has almost no negative impact on performance, but has a positive effect on image quality, so X16 and older are used everywhere.
Optimizing surface format
As in the case of morphological filtering, it is an additional filtering method, only in this case, not antialiasing, but textures.
- Theoretically, it should, like anisotropic filtering, improve image quality by additionally filtering textures;
- Practically (and visually) it is noticeably small, it usually affects the performance questionably, but it can affect the stability. It is recommended that you avoid using this setting again.
Wait for vertical update (aka vertical sync, aka V-Sync)
Synchronizes frame rate (FPS) with monitor refresh rate:
- A driver (not in an application) usually has four global values: always disabled, disabled (if not specified by the application), enabled (if not specified by the application), always enabled;
- In rare cases, it allows you to avoid rare, fast, visually subtle "stripes" that seem to break the image into two components, which flow quickly and are even familiar to someone (some do not meet them at all or do not notice them);
- Sold by marketers as a miracle of miracles, smoother images and everything else;
- In fact, due to the FPS limitation (especially if it is below the monitor frame rate as such), it usually negatively affects performance with extremely dubious benefits;
- Statements about reducing noise, energy consumption, etc., by limiting this performance value, are sucked from the finger, because in modern world and under normal conditions, the video card itself changes frequencies, power consumption, rotation speed and much more, without artificial restrictions. Twice V-Sync is generally gibberish, but that's not what we're talking about now;
- In view of the above, it is recommended that you keep it off at all times. If you really, by eye, in this particular game-situation-configuration see the visual benefit after turning it on or off, then it is turned on.
OpenGL triple buffering (and more)
Exaggerated, it is an I / O buffer that accelerates the speed of access to the generated data:
- Frames are drawn at a frequency lower or higher than the refresh rate of the screen, ready-made (formed by the equipment before the program that sent them back for formation requested them back) are placed in a buffer (storage, so to speak), and the next frame is given for calculation, thus reducing the delay + the program does not need to poll the equipment to receive screen update events and the algorithm can be freely executed as quickly as possible;
- Accordingly, there is double buffering (it is usually used), there is triple (just what we are describing now), double uses two buffers, triple three (maybe more, but this no longer makes a tangible difference);
- Double: if the system has two buffers, A and B, it can display buffer B while simultaneously generating a new image in buffer A, but you need to wait for the buffers to change due to the imaging delay;
- Triple: if the system has three buffers: A, B, and C, it does not need to wait for the buffers to change. It can display buffer B, forming an image in buffer A, in a little more detail.
- What to do: it is worth including, despite the restrictions.
Shader cache
Allows you to store compiled shaders in the cache, which can sometimes significantly speed up processing, reduce the load on the CPU and GPU, operating immediately with ready-made data without unnecessary compilation and taking them from storage.
- Is the value "off" or " AMD optimized"(in other cards the settings may not be, have a different name or enabled by default), it is often not recommended to disable it, because this allows you to achieve smoother footage without unnecessary rendering delays, that is, leave the optimized or enabled position.
Tessellation mode and tessellation as such
This is the thing responsible for the global improvement of the picture. At its basic level, it is a method of dividing polygons into smaller pieces.
Applying tessellation to the rough model (left) creates a smoother model (in the same picture, but in the middle), using displacement maps (in the same picture, but to the right) gives characters a cinematic realism.
- Within the driver, it has three options: AMD optimized, use application settings and override application settings;
- Most often, you should leave it as it is, but more often, if for some reason the FPS in the game with the requirements below (with a more powerful card) is small, and strange slowdowns, freezes (freezes) and drawdowns are observed where they should not be, here makes sense to use application settings and / or even manual mode overrides;
- Overriding allows you to set levels from 2x to 64x and higher, or disable it altogether. The level sets the very fragmentation and directly affects the performance and quality of the picture. With this value it makes sense to play with this parameter if something goes wrong. And so too.
Energy efficiency
Allows you to chew an order of magnitude less energy at the cost of productivity loss:
- Turn it off if performance is needed. Perhaps that's all there is to say here.
Frame rate control
Allows you to select and set a frame rate limit in the application, ostensibly, as in the case of vertical sync, to add smoothness to the footage.
- In fact, very few people need it and why, except for the opposite cases - when the frame rate is artificially limited in the application (by settings that cannot be changed), here you can try to override this value with the slider, which allows, in rare cases, to remove this limitation and work on full (or the value that you specified).
Perhaps from general settings that's all there is to know. Let's go through the specific software interfaces, as well as Overdrive and Wattman.
How to configure a video card through the "old" software - Catalyst Control Center
In the process of installing / updating drivers (or, if you have already bought a ready-made PC with a pre-installed OS), in addition to the module itself, which is responsible for showing the picture on the monitor screen, an additional module is installed called Catalyst Control Center (ACCC).
This software shell is a control center for working with video adapters and allows you to perform any manipulations with both the settings of the card itself and the connected monitor.
By default, ACCC resides in the tray on the desktop as a small icon (see image).

However, for some reason, you may not find the Control Center icon in standard place, then, to start working with ACCC, you need to update your graphics card.
There are many ways to do this, but I prefer to do it using a special free utility from AMD called amddriverdownloader (old name).
Who does not know, this is the technology of automatic detection (search and detection) of the most latest versions drivers from the manufacturer. Its advantages are in its clarity, convenience, free of charge and automation of the process of searching and downloading drivers. The disadvantages are that it does not always do it correctly, like any automated system.
Thanks to this, now you do not need to go to the manufacturer's website, look for the required video adapter model, drive in your OS and bit depth. You just download the utility, run it at any time and it itself determines whether there is anything new according to your firewood and uploads the required distribution kit to your PC. So, to start working with ACCC, we update the drivers through the utility by going to the official website in the Download section and clicking on “Download”.

After downloading, you start the standard firewood installation, along with which our today's hero of the occasion - the control center, will be delivered to you. To enter it, you need to click on the icon (AMD red-gray) of the desktop tray with the right mouse button and click on the corresponding inscription. 
In fact, ACCC is nothing more than user interface to install, configure, and access features for AMD Radeon Graphics and AMD APUs. This app provides video settings for adjusting display settings, display profiles and picture quality.
ACCC plays a very important role in the functioning of your video card and allows you to add the necessary fps (parrots) in games. That is, with it you can run a game or an application that is initially more demanding on the characteristics of your PC at a decent flight level and, in particular, video cards.
Note:
ATI Technologies, known for making computer processors, has developed the Catalyst Control Center (CCC) to complement its Radeon line of graphics cards. The utility first became available for R series video cards. After AMD acquired ATI, the utility became (in old version) be called.
Immediately after starting the center, click on the "Options" button (above the question mark) and select the item - " Expanded view”(See image). Thus, we switch to a more advanced mode with big amount settings and more user-friendly interface interactions.

In the parameters tab, you may also be interested in the item “ Enable taskbar menu"- is responsible for whether or not to display the tray icon and" Restore factory settings”- rollback to clean settings, in case you changed something in optimization :).
Also, by clicking on the question mark, you will call up an extensive help on the control center, where you can study all the settings of the utility up and down.

So, as the name of the utility suggests, " Control center"- it acts as a hub for all options and functions associated with an AMD graphics card. By running ACCC, users have access to various functions:
- Desktop management;
- Setting up digital panels / display;
- Configuring video clip parameters;
- Setting up 3D applications;
- Performance Management, AMD OverDrive - CPU and GPU overclocking.
Let's walk through the basics of the settings and walk through the most important tabs in the AMD Catalyst Control Center.
The first thing I would like to draw your attention to is the item “ Desktop properties"in the dropdown menu" Desktop management”. It allows you to change the size, refresh rate, color quality and rotation of the desktop.

Here we are interested in the settings under the numbers (1, 2, 3). It is necessary to set (if they were automatically detected incorrectly) the correct resolution, bit depth (color rendition quality), screen refresh rate, and also set the orientation (landscape or portrait).
To do this, you need to get the documentation (specifications for the monitor) and find there the values of the first and third characteristics in the section “ Monitor technical parameters”.
There are many settings here, and all of them, to one degree or another, are responsible for the beauty of the image, i.e. brightness, color, contrast and others like them parameters. I must say that in most cases the standard settings of the center are quite satisfactory and do not require any special custom tweaking.
Therefore, it is better not to change them, because changing one will lead to a violation of the general balance and a change in a bunch of related parameters. In other words, even small adjustments can lead to the image “floating away”. Useful settings for us here will be the "Quality" tab: video quality and deinterlacing.
We need to set the following checkboxes (see image):

- "Dynamic contrast"Is an automatic brightness adjustment depending on the picture on the monitor. It is responsible for better display of rapidly changing scenes, for example, when watching movies or playing fast-paced games.
- “Deinterlacing” is the elimination of interlacing or “comb effect” when watching a video. To exaggerate, the comb effect is the driving away of a moving object, i.e. when there are two frame fields at once on the monitor screen, displaced relative to each other. Deinterlacing removes this effect.
Also, for a smoother video playback process, you must check the box for “frame change detection” in the video stream when using deinterlacing.
In the "Video" tab there are other settings that deserve our attention, and these are:
- AMD Steady Video - shaky image stabilization;
- Global video quality;
- Faster video conversion.
If your home video shakes (as if after a big budun :)), then you need to check the box next to AMD Steady Video. Setting “ Global video quality” –> “Forced anti-aliased video”Allows you to ensure smooth playback of the video stream without dropping frames. We put a tick there.
Setting “ Faster video conversion”Allows you to connect the resources of your graphics equipment to the video conversion process. Check the box “ Enable hardware acceleration”, If you often encode video by means of various players and want to speed up this process.

So, now let's jump over two points "Games" and " performance”And stop at the“ Information ”tab. Actually, there is nothing unusual here, standard information from the manufacturer.
In the tab Homepage AMD is interested in the item “Check for driver updates”, which allows you to download the latest firewood to your computer, ie. update their version and the Catalyst Control Center core itself.
To download the “woodpile of firewood”, you need to click on the blue arrow and the driver update process will start. 
The next two tabs are Programs and Hardware devices”. They make it possible to learn in detail about the hardware devices of the system, the graphics adapter and, in general, to obtain information about the system (the button “ System information”).

With the basic setting sorted out. Let's now take a look at the performance and overclocking possibilities that reside in the OverDrive section.
OverDrive in the "old" version of AMD driver software
If you are an avid gamer and own a video card from AMD, then you can count on a slight increase in its power for free. Optimal and correct setting will help to squeeze the cherished fps in games and add speed in various 3D applications. Two settings are responsible for this in the control center: “ Performance”And“ Games ”.
Let's consider them in more detail and start in order.
AMD OverDrive Technology is an AMD development for overclocking graphics cards and GPUs at the driver level. To start using it, you must read and accept the terms of the license agreement (see image).

I think you have a question on your lips: “ What does AMD OverDrive allow and how is it useful for me as a user?”. I answer, she:
- Has a set of preset parameters for beginners and overclocking enthusiasts. You can easily select a pre-configured memory profile for optimal performance of your DDR3 memory. You can also manually control performance parameters from the BIOS and create your own profiles for specific applications;
- Automatic frequency control makes overclocking even faster and easier;
- Allows you to control the fan speed to improve performance;
- Allows you to control all of your performance settings, including memory clock speed, voltage and timings.
After accepting the terms of the license and warning that if you have crooked hands it is better not to overclock (:)), the next window pops up.

Here you can play with settings and add parrots to applications. This method works as follows. We change any of the parameters by several units, go into the 3D application, start the FPS-meter, and if there is an increase in parrots and everything is working stably, then we leave these parameters. Otherwise, we roll back to the default parameters (key E) and change the parameters more carefully, until we find a stable-increased combination of settings.
Note:
In order for the rolled-up changes to take effect and affect the performance of the system, you must check the “ Enable Graphics Drive”.
Here are the results (in terms of performance gain) I was able to achieve just by playing with the settings of the video card and (to a lesser extent) the processor frequencies.
The actual default settings were as follows:

... and the number of fps in the Metro Last Light Redux game (1080p, the settings are very high) were: 
And here is what they were changed to (on the map):

... and the number of FPS in the game Metro Last Light Redux with the same graphics settings is:

In total, we have 41 versus 44 - quite a decent result for a couple of gestures with the settings of the card and (to a lesser extent) the processor. If you sit thoroughly and twist the processor properly, then 5-7 extra parrots can be knocked out for sure.
Note:
In addition to the video card, you can also overclock the processor using AMD OverDrive. However, it must be from AMD.
As you hopefully remember, there is one more item on the agenda, this is setting up 3D applications. To start working with them, go to the corresponding ACCC menu:

We see the attachment “ System parameters”, And in it a table with two columns:“ Features ”and“ Settings ”. At the bottom, you can add a game application ("Add" button) .exe format and set the graphics parameters for a specific game (application), that is, the so-called profile.
You set the local settings (anti-aliasing, filtering, sampling and everything else) based on what is written below, that is, in the first half of the article under the appropriate subheading.
How to set up a Radeon video card through the "new" software - AMD (ATI) Software (Crimson and beyond)
If you have a brand new card, latest system and drivers, then most likely you already have a fresh version of the software installed to work with driver settings. It is much more visual, concise and contains very few tabs ( Games, Video, Relive, Display and System), each of which very clearly allows you to control the video card.

The Games section is responsible for managing the main performance settings that are listed above, that is, in the first half of the article under the appropriate subheading.

The "Video" tab is responsible for adjusting the color, brightness and contrast for video and everything that accompanies it. There are several preset profiles here, the result of which is visible, as they say, on the fly (start the video and poke the profile with the mouse).

Relive, if installed, allows you to capture video and manage the settings associated with it. We will not comment on anything here, since we are not talking about that.

The "Display" section allows you to manage the resolution settings, change the color temperature of the monitor, so to speak, programmatically, set ultra-high resolution, scaling, etc.

The last section, which is called "System" and contains the "Overview" tabs, " Software"and" Hardware ", will help you find out the current driver version, frequencies, the name of the video card, its detailed characteristics and some of the parameters of the computer.
As you can see, everything here is much more concise and convenient.
Configuring Wattman in the "new" version of AMD (ATI) driver software
In the section with games there are two subsections, one of which is responsible for global settings, the second for deeper (overclocking), which, the section is called (at the time of the article update) Wattman, which replaced Overdrive.

If you decide to overclock and change frequencies, then go to this section and agree with the warning, which informs you that everything you do, you do at your own peril and risk, you may lose the warranty and so on (in general, read the text ).

Next, you will see such a large sheet (you can stretch the window with the mouse), the first section in which is responsible for monitoring the state (frequency, temperature, cooler speed, etc.) over time (that is, at the first start it may be empty, you should wait).

The second section allows you to change frequencies simply and quickly by pulling the slider to the desired percentage and, at the same time, seeing how this affects different states and voltages. The voltage can also be set manually, but this is strongly discouraged. The percentages should be increased slowly (preferably 1%), after each of which the video card should be tested for stability for a long time, trying to achieve the maximum gain with maximum stability.

The third section similarly adjusts the values for the memory frequency and memory voltage (which also should not be changed manually if you are not an experienced overclocker), thereby overclocking it. It is worth overclocking the parameters in turn (separately the frequency and separately the memory), and then try to link them together, because one depends on the other (see).

The last section allows you to control the rotational speed of the coolers of the cooling system, depending on the temperature (right side) and in a given speed range (RPM) (from minimum to maximum + acoustic limit).
On this, perhaps, everything that is worth knowing here and can be known. We still recommend controlling speed and overclocking through Afterburner for a detailed article on this topic.
Well, that's probably all the settings that you can tweak to improve the "flyability" and better "visualization" of 3D applications.
In order for you to have a clearer picture of all of the above in your head, I will give a general memo under the title “ How can I improve graphics performance for games?”:
Today we have fully figured out the topic of configuring video card drivers. I am sure that now each of you will be able to do it correctly and, if necessary, squeeze extra parrots out of your graphic babies :)
As always, if you have any questions, additions, thoughts, etc., then welcome to the comments on this entry.
PS: Thanks to team member 25 FRAME for the original existence of this article
A clean installation of Windows, as well as the installation of new hardware components in a PC, almost inevitably ends up for the user with the need to find and add drivers for various devices to the system. Video card as one of the most important components modern computers and laptops requires the installation of components to be able to function properly almost in the first place. Owners of Radeon graphics adapters can practically not worry about this issue, because a powerful and functional tool has been created for them - AMD Catalyst Control Center.
Download and update AMD drivers via Catalyst Control Center
We can say that AMD Catalyst Control Center (CCC) is designed mainly to maintain the performance of video cards, which are based on graphics AMD processor, at the proper level, which means that the installation and maintenance of drivers up to date should be carried out using this software without any problems. In fact, it is.
The CCC installer is now Catalyst Software Suite. It cannot be downloaded from the official site for modern powerful graphics cards - the developers have created a new application for them: AMD Radeon Software. Use it to install and update the video card software.
Automatic installation
A package of drivers for graphics adapters Advanced Micro Devices is included in Catalyst Control Center and all the necessary components are added to the system when the application is installed. In order to install the driver for your video adapter, you just need to follow a few simple steps.
- Download the AMD Catalyst Control Center installer from the manufacturer's official website in the technical support section. To obtain the required driver version, you need to determine the type, series and model of the graphics processor on the basis of which the video card is built.

After that, you will need to specify the version and bitness of the operating system used.

The final step will be to expand the tab and select Catalyst Software Suite.
- After the Catalyst installer is loaded, start the installation.

The initial stage is to unpack the components necessary for the installer to work along the path specified by the user.
- After unpacking, the welcome window of the Catalyst Installation Manager will automatically start, in which you can select the language of the installer interface, as well as the Control Center components that will be installed along with the drivers.
- The CCC installer can not only install the required components, but also remove them from the system. Therefore, a request for further operations appears. Push the button "Set",

which will bring up the next window.
- To start automatic installation graphics adapter drivers and software package Katalist Control Center, set the installation type switch to "Fast" and press the button "Further".
- If this is the first time you are installing AMD drivers and software, you will need to create a folder to copy the components to. The directory will be created automatically after clicking the button "Yes" in the corresponding request window. In addition, you will need to accept the terms of the License Agreement by clicking the appropriate button.
- Before starting the procedure for copying files, the system will be analyzed for the presence of a graphics adapter and its parameters for installing the latest version of the drivers.
- The further process is fully automated,
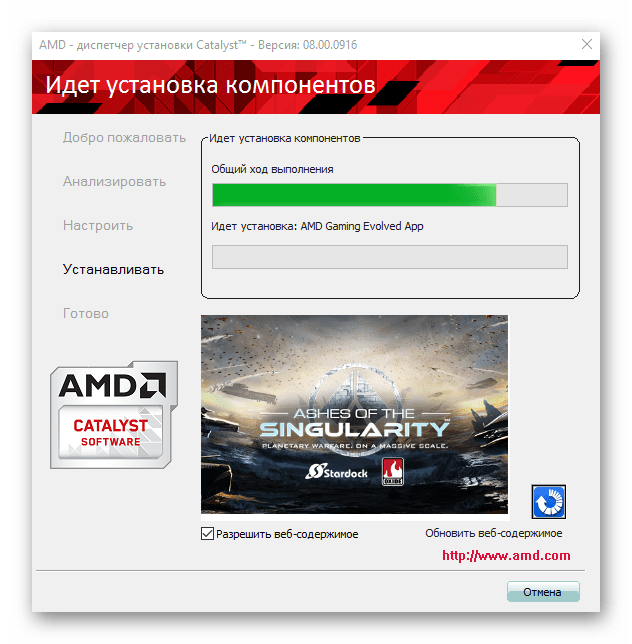
you just need to wait for the installation to complete and press the button "Ready" in the final installer window.
- The final stage is a system reboot, which will start immediately after pressing the button "Yes" in the request window for the operation.
- After rebooting, you can check the presence of the driver in the system by opening "Device Manager".


Updating Drivers
The software is developing at a rather serious pace and AMD graphics card drivers are no exception. The manufacturer is constantly improving the software and therefore updates should not be neglected. In addition, all the possibilities are provided for this in the Catalist Control Center.


As you can see, despite the importance of drivers in the functioning of Advanced Micro Devices video cards, installing and updating them using the Catalyst Control Center turns into the simplest procedure, the implementation of which usually does not cause difficulties even for novice users.
Any video card, even the most productive and modern, is required to work suitable driver or special utility for additional customization... Radeon video adapters, discrete or integrated, perform much better and deliver higher frame rates after installing the AMD Catalyst Control Center (CCC), first released in 2007, on a computer. This tool is intended for fine-tuning the characteristics of graphic cards of the American brand Advanced Micro Devices.
CCC utility, which has been bundled with drivers for more than 10 years video cards radeon, in the future may replace the Software Crimson software package from the same manufacturer. However, today it still needs to be installed on a desktop PC or laptop with AMD graphics.
The utility is enhanced every year to improve resource allocation and performance for graphics cards that continue to compete with Nvidia models.
The list of Catalyst Control Center features includes:
- optimization of 3D-graphics, which allows to increase the image quality in most games;
- integration with social networks, which improves the work of widgets and game applications built into these resources;
- anti-aliasing required for use in games;
- laptop power management to reduce power consumption mobile computers when running on battery power;
- setting the optimal level of contrast and detail of the picture is a function that is useful not only for games, but also when working with graphic editors and watching movies in high definition;
- simultaneous configuration of several screens connected to the video card (computer displays or TVs);
- software update for video adapters, in most cases automatic.
The advantages of using AMD CCC include low computer resource requirements, a built-in manager for games, and the ability to hardware accelerate video cards.
Control Center works on modern high-performance computers and legacy devices, allowing you to speed up graphics and add a few frames per second for gameplay. Using the same utility, you can manually adjust the frame rate.
AMD Catalyst Control Center: Configuring for Gaming
Playing with the CCC control center is more convenient and easier, and the process of setting up games takes no more than a few minutes. And the only problem typical for laptops with integrated and discrete graphics installed at the same time arises when there are no graphics card settings in the utility menu, and there is no way to optimize the image.
The issue is resolved by switching from one graphics adapter to another - through the BIOS, using the Catalyst Control Center, or by choosing the appropriate GPU that is offered to the laptop user when the power supply is changed.
When deciding on the settings of the video card for the game, you should decide on the need to make changes. If the frame rate during gameplay is high enough and there are no graphics issues, it is recommended that you leave Control Center at its default settings. If you need to increase the fps level, you should do the following:
- Open AMD Catalyst Control Center.
- Select the game tab in the left column.
- Click on the "Add" button located in the application settings section.
- Find the executable file of the game in the list (it has the extension .exe and in Windows it is designated as "Application") and click "OK".
The utility automatically analyzes game settings and optimizes the built-in or discrete graphics. Thanks to this, the video card not only works faster, but also wears out less during operation.
When manually configuring graphics, the user gets the opportunity to independently choose maximum quality images, fast game performance, or standard values settings that suggest a compromise between fps and resolution.
How to start AMD Catalyst Control Center
The control center requires special attention when it first starts up. Before opening AMD Catalyst Control Center, the user selects the configuration mode:
- basic, which sets the default parameters of the video card and allows you to further adjust the resolution, quality and the number of connected image output devices;
- advanced, allowing manual adjustment of most of the graphics characteristics.
If there is no need to change the parameters of the video card, it is recommended to select normal mode. For experienced user If you are going to optimize the work of games, you should give preference to the second option.
If there is a problem that the AMD Catalyst Control Center does not open, it is enough to update the drivers after removing the old ones.
How to update AMD Catalyst Control Center
To update the Control Center, the user will need to do almost the same steps as when installing new drivers for any other computer component. You can get a new version of the utility along with control programs for the graphics adapter on the official website of the company.
Where to download AMD Catalyst Control Center
The only correct option when downloading the CCC control center is the official site of the AMD graphics card manufacturer. After going to the home page, the computer owner should open the “Download AMD Drivers & Software” tab of the software.
After that, in the right half of the page, you can see the menu for manual selection of the AMD video card and find the appropriate series and model. The last item "Select the supported operating system that you have" allows you to select one of the operating systems supported by the card:
- for old video adapters it will be Windows XP and Unix platforms;
- for video cards of later years of release - Windows 7 and 8;
- for the latest desktop models - Windows 10 only.
After choosing the appropriate option, you should download this version and run the installation on your computer. It is undesirable to use third-party sites for downloading. The result can be not only the installation of outdated software, but also an increased risk of infecting the system with viruses.
How to install AMD Catalyst Control Center

There are three ways to install the Control Center:
- Going to the manufacturer's official website and choosing a suitable video card model. After downloading the installation file, it is installed on the computer.
- By choice automatic detection video adapter models on the same site.
- Using utilities to automatically update drivers such as Drivers Pack Solution.
AMD Catalyst Won't Start: What to Do?
Problems that arise when installing and running a software package are often associated with an incorrectly selected system bit. Correct operation of the program is possible only if the version downloaded from the manufacturer's resource matches the bitness of Windows. For example, for 32-bit Windows, the AMD Catalyst package installation error occurs when trying to install the control center for a 64-bit platform.
The utility does not start even if there are problems with version compatibility. Therefore, if AMD Catalyst Control Center fails to start, it is worth uninstalling the already installed video adapter software.
How to completely uninstall AMD Catalyst Control Center
One way to fix the problem with starting Control Center is to completely remove AMD CCC from the computer. To do this, the user must do the following:
- Open the control panel.
- Select Programs and Features (or Add or Remove Programs for Windows XP).
- Find the utility to be removed in the list that opens and select its removal.
When the program is completely removed from the computer, you should reboot the system. The PC (or laptop) is now ready to install the new version of the Control Center.
Best Gaming Setting: Video
In contact with