 entrance
How to reinstall Windows: Step-by-step instructions. Beginner benefits: Installing Windows XP in Windows XP details to change
| Posted on 06/22/2018 |Briefly described practical steps to start the already installed Windows XP SP3 On the new hardware. This often needs to be done in connection with the upgrade for various reasons (there is not enough speed of the old system, or it stopped working). In my work, I strongly helped links and, information from there can also be used in various cases. All software mentioned in the article can be downloaded by links.
When I climbed the move to a new iron without reinstallation, it was not particularly confident in success. Judge yourself - the new iron is different from the old completely (only SSD remained hDDon which there was Windows XP SP3). The table lists the main components that affect the system performance.
Old iron was bought 7 years ago (except for the video card, it was replaced later) and by those standards it was "Oh-th." It was worth it then much more than the present. Moving was surprisingly successful and not very difficult. So the process is in steps.
[1. Backup]
First, back up all important files that are on your system disk where Windows XP is installed (on another disc). This is necessary to avoid any randomness to ensure that the errors that you are inappropriate allowed for manipulations with the disk and the system did not affect the safety of your data. All your data are most likely located in the Documents and Settings folder, software installed In Program Files, Windows, at least you need to make a copy of these folders. Ideal option - make a disk image special programs. For example, Windows has for this Norton Ghost., Acronis True. Image., on Linux utility dD. If the amount of data on the disk is too large to make an image, then you can clean it, removing unnecessary, or rewrite only what is needed.
The copying process can be made on the old gland if it still works. If the old system is inoperable, you can pull the disk from the computer, transfer to the working computer and make a copy. You can do this and on the new hardware, not running Windows if you apply the Hiren's BootCD boot disk (it is an ISO image can be downloaded by reference). On this disk there is a lot of useful - utilities for cleaning the registry, repair of the disk, recovery of files, reset passwords, delete data, read more.
[2. Required programs]
 |
 |
Download the Supplement Software links. Hiren's Bootcd. Write down on the CD-ROM (this will be bootable), and Terrabyte OSD Tool Script 3.85 (TBOSDTS_PRO) Unpack from the archive and write to the USB flash drive. The TBOSDTS_PRO program needs to be run using Hiren's Bootcd, writing to a USB or CD (on the Hiren's BootCD itself there is no this program).
[3. Preparation of Windows to transfer to new iron]
At this step, all old are removed windows driver (registry entries). Load from Hiren's BootCD, in the disk menu, select Mini Windows XP. Stick flash drive on which the TBOSDTS_PRO program is recorded, and start it with a TBOSDTW label - Label (link to the TBOSDTW.EXE startup.tbs command line), or enter the TBOSDTW.EXE startup.tbs on the command line. A text menu from 9 points will appear in the CMD black window.

Select 3 (Osdtool.tbs). In the next menu, select PHYSICAL DRIVE.


Delete all the drivers on Windows XP, for this, in the main menu, select Remove Installed Drivers -\u003e Remove All Installed Drivers.

[4. Installing the standard IDE driver]
In the main menu, select Install Drivers, and then select Install Standard IDE driver.
[5. Channel Cleaning Hal (Processor Type, CPU TYPE)]
In the main menu, select Change Hal. (Hardware Application Layer, defining the type of CPU). In the next menu, select Halaacpi.dll (ACPI Uniprocessor PC), the first line in the list.

This is the basic steps to transfer Windows XP completed. You can restart the system from your system hard disk.
[6. Activation of Windows Xp.]
After the system starts on the new hardware, it will notice it and will ask for a new activation. Run it using Windows Activation Wizard.
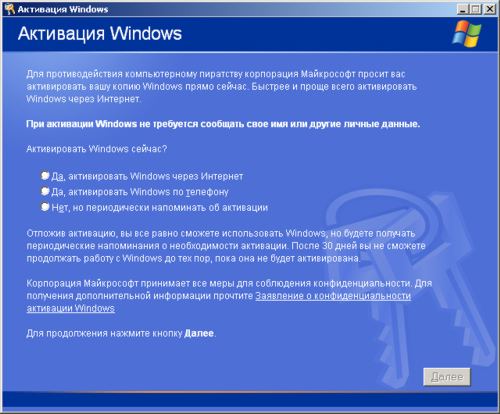

For activation, use free telephone (Opening hours from 8.00 to 22.00, Moscow time) Microsoft Product Activation Center, 8-800-200-80-02 .
[Eliminating possible problems]
1 . The system is not loaded, or a lot of errors when loading. Try reinstalling the "over" system, while the old installation is saved, but many errors in the configuration and files will be corrected (for this, click the 'button' R.', Which specifies the restoration of the Windows system). For such reinstallation, you will need a Windows XP boot disk with which you installed the system for the first time. After such a recovery, it is possible to install Service Pak 3, since the Windows boot disk can be older versions of system files. After reinstalling the service pack, you will need to re-activate Windows. In addition, after installing the service pack, the system recovery (tracking discs) is reappeared. To speed up the work, I advise you to leave the disc tracking only on the system disk (which indicates variable environment % SystemDrive%).
2 . If for some reason system files have been deleted or corrupted, then restore the original state of the Windows XP system will help start from command line SFC / SCANNOW.This will take the Windows XP installation disk to the CD-ROM drive.

Checking system files will take about 5 to 15 minutes, depending on the speed of the disk. If the WPA_KILL patch has been installed earlier, then after the SFC / ScanNow is completed, it will be necessary to launch it again.
3 . CHIPSET drivers are not installed motherboard With the mistake "not enough rights." Make sure you install the driver drivers with administrator rights. Try to allow Windows to find the driver on the Internet (this is the first thing asks the driver installation wizard).
4 . Windows XP blocked the login and requires activation. This can even happen to your licensed system if when recovering the clock on the motherboard was installed incorrectly, but then it was translated to a new time (this automatically occurs when connected to the Internet). If you can not get qualified help from technical support, then to eliminate the problem, the easiest way to boot into safe mode And run the WPA_KILL utility.
5 . After starting WPA_KILL, an automatic update does not work ("The specified compliance key is not detected in any of the active activation contexts.").
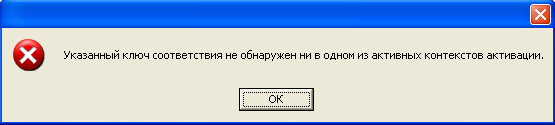
Customize update local server Provider, the setup procedure is described in.
6 . BSOD STOP 0x0000007B may occur at the boot stage if Windows XP cannot find suitable Driver For hard disk. The reason may be that you have not performed steps 3 and / or 4. Perform steps 3 and 4 of this article.
UPD140520: Sergey advised to switch to BIOS installation from Ahci. on the IDE.
7 . Problems S. WMI (Windows Management Instrumentation Service) are expressed in the fact that some system management functions are not available. For example, some drivers are not installed (it is not enough "You are not right" errors), some programs are not installed or are not launched (with an error "Unable to run WMI"), the firewall service is not available in the network connection properties, the services are not displayed in the "Extended »Services management consoles, etc.
The re-registration and recovery procedure WMI is well described in (in English).
8 . To clean and correct the registry, you can use free program Registry Life..
9 . Common method to eliminate all windows troubleshooting With saving all available settings and installed programs is reinstalling Windows XP in update mode.
1
. Preparation of the operating system for transfer to another hardware Site: Forum.ru-board.com.
2
. Transfer of the system to another motherboard or cloning Windows XP (Make Universal Image Windows XP) Site: Gromr1.blogSpot.ru
3
. Hiren's BootCD boot disk image (HBCD15.1_RUSSIAN_BY_LEXAPASS.ISO).
4
. 151029! CloneXP.zip - TBOSDTS_PRO, GRUB4DOS, USB_Format, documentation.
5
. Overview boot disk Hiren's BootCD (disk to restore Widows).
6
. Windows XP Service Pack 3 (SP3) RUSSIAN VERSION (WindowsXP-KB936929-SP3-X86-RUS.exe).
7
. Configuring update server for automatic update service.
8
. Repairing and Re-RegisterIing WMI Site: windowsXp.mvps.org.
9
. How to update (reinstall) Microsoft Windows. XP Site: Support.microsoft.com.
10
. Transferring Windows 7 to new HDD built-in utilities.
Substitution of motherboard without reinstalling Windows
In most cases after replacing the motherboard Windows stops loading. When booting Windows appears blue screen (BSOD) with an error Stop 0x0000007b.. This is due to the change of the ATA / SATA bus controller.

The fact is that Windows cannot independently change the controller driver when loading. As a result, when loading, the operating system simply loses a hard disk and cannot continue loading.
The question arises: how to produce replace the motherboard without reinstalling Windows? After all, it is not difficult to reinstall Windows, but all programs and settings are lost. And it is often unacceptable!
Fashion replace the motherboard without reinstalling OS three. If Uvas Windows 7, immediately go to option 3
Option 1 - Old Working Board Working (Windows XP)
If with old motherboard It is possible to boot in Windows XP, then you need to replace the IDE and SATA drivers to standard.
For this B. device Manager Open the properties of the controller (the name depends on the model of the motherboard). On the tab Driverpress the button Refresh.

On the question of connecting to the Internet to search for driver No, not this time and click Further. In the next window, choose Installation from the specified location and Zhmem. Further. In the driver's search options window that appears, select Do not search. I myself choose necessary driver and click Further.
In the window that appears, select from the list Standard two-channel pCI controller IDE and click Further.

After completing the driver installation, click Ready And reboot the computer.
After downloading, check in Device Managerinstalled standard IDE Controller Driver And turn off the computer.
If there is no driver selection list Standard IDE Controller Driver (for example, in the case of the SATA controller), you can simply delete installed driver Controller of the old motherboard. To do this, in the Device Manager, right-click on the device and select context menu Delete. After deletion, turn off the computer.
Now produce replacement of motherboard on a new one. Windows XP should boot without any problems. After that, it remains only to install all the drivers for a new motherboard from the disk and everything!
Second option replacing the motherboard without reinstalling Windows XP It should be used longer than the first and use it if the computer with the old motherboard does not turn on or loading is not possible. We will need the Windows XP installation disk. If there is no disc, you can download the disk image (WinXP Professional SP3 with an integrated package of controller drivers hard disks) And write it on the CD-R disc, for example, using the DeepBurner 1.9 (distribution kit you can download free).
For windows XP Recovery After replacing the motherboardyou must do the following:
Install the new motherboard and plug all devices.
Start loading from the installation windows disk XP. On the first installation screen (Figure below), press ENTER to start installing Windows XP.

On the next screen, press F8 to accept the license agreement.
After that, the installation program will search for installed operating systems and will display their list.

Select the operating system to recover and click R. . The further process is not very different from the usual installation of Windows XP. The differences are that the installation program will not ask on which partition of the hard disk to install the OS And it will not offer to enter the name of the computer and the username. Be prepared to enter the Windows XP license code and activate it after installation via the Internet.
After the installation is completed, you must install all drivers for a new motherboard. All programs, user files and operating system settings will remain the same.
Option 3 - Correction of the IDE controller driver in the registry (Windows 7)
If the motherboard is replaced without reinstalling Windows 7, everything is more complicated. Previous 2 options do not roll. Restore Windows 7 With its update from the installation disk, it will not work either, since it is possible to run this function only from the already loaded OS.
But do not get upset! It will help the ERD Commander (download the image of the CD, or we make the USB ERD COMMANDER bootable USB flash drive). With it, we will make adjustments to the Windows 7 registry required to download on a new controller.
Baister! Load from the recorded disk or flash drive. In the download menu, select the version of ERD Commander 6.5 for windows 7.

Selection of ERD Commander version for download
To the question "Initialize network connection in the background?" Respond Not.
To the question "reassign the letters of discs ..." answer Yes.
Select the keyboard layout and click the button Further. Then choose from the list our operating system and click Further.

Select the operating system to which the ERD Commander will be connected
It turned out unsuccessfully, the search for download problems will begin.
Search for problems in Windows 7 download
Press CancelIn order not to spend in vain time, since this startup recovery means in case of changing the motherboard does not help. To the question "Stop troubleshooting?" Respond Yes. The following message is that failed to eliminate malfunctions, do not be afraid and press the button Ready.
In the window that appears, select the item Microsoft Diagnostics and Recovery Toolset.

Now launch the registry editor.
First of all, it is necessary to remove the registry branch HKLM \\ System \\ MountedDevices

Now you need to enable the launch of services downloading standard Drivers IDE and SATA controllers.

Open a branch HKLM \\ SYSTEM \\ CURRENTCONTROLSET \\ SERVICES In the left part of the registry editor. Now check the following sections in this thread: aMDIDE, aMDSATA., amdxata., aTAPI, intelide., msahci., pciide.. Parameter Start. Everyone should be equal to 0x00000000 (0). SetTart \u003d 0 - Starting a service when booting Windows. If it is equal to 0x00000003 (3) click twice the name of the parameter (START) and change the value to 0 (figure below) and click OK.

After start.will be set to 0 in all the registry sections specified above, close the registry editor and reboot the computer in as usual mode. In most cases, this is enough to successfully download Windows 7. Now you need to install the drivers for a new motherboard.
If not helped
If the actions did not help and Windows 7 still does not load and gives the STOP 0x0000007B error, it means that the required controller driver does not boot. Let's try to enable the download of all known driver operating system.
To do this, set the value of the parameter Start. Equal 0 in the following services: aDP94xx, adpahci., aDPU320., aIC78xx, aMDSBS., arc, arcsas., elxstor, HPSAMD., iASTORV., iIRSP., Lsi_fc., Lsi_sas., Lsi_sas2., Lsi_scsi., megasas., Megasr., nfrd960, nvraid., nvstor, qL2300, qL40XX., Sisraid2., Sisraid4., vHDMP., vsmraid., aliide., cmdide, nvraid., viaide. .
Reboot your computer as usual. OS should boot.
Windows XP boot can also be restored in the same way, but everything is increasing there and I will not describe in this article. Who is interested, can read.
This means that your computer will not receive updates for software and security system. That is, with an unsupported OS, it will become even more vulnerable for viruses and malicious programs.
Now you have only several options for replacing Windows XP. Here they are:
- Continue working with Windows XP and leave your computer unprotected and practically unsuitable
- Go to Windows 7 or Windows 8 and pay about $ 100 for antiviruses and office products
- Go to Linux and enjoy freedom and saved money
Thought about the third version and argue on the topic of switching from Windows XP on Linux? Let me help you decide. You use your computer mainly for server surfing, watching movies, listening to music, every standard office work and so on? If the answer is positive, then you can safely go to Linux without unnecessary fears.
Do not be afraid. Linux is no longer a playground for guys. No need to be a command line ninja or a super hacker to use Linux. Ordinary people can also use it. Use the Linux desk also just like any other operating system. If you are thinking about what distribution it is more suitable for you, then I have a list of the four best Linux distributions that can replace Windows XP.
Linux OS, presented here, best suited those who are used to working with Windows XP, as they have similar interfaces. In addition, these distributions are known for their ability to work directly out of the box, so you do not have to worry because possible unexpected problems. Enough chatter, let's look at 4. the best alternatives Windows XP.
Linux Mint Mate:
Linux Mint Xfce:

If you are already working with Windows XP for a long time, it may also be because your system, which once has long been very different, today is hopelessly outdated. It is possible that that's why you do not want / can't go to Windows 7 or 8. Then, if you have a RAM restrictions or an outdated Pentium 4 Linux processor will help you out.
Linux Mint. Xfce is an XFCE version of Linux Mate, A XFCE is a lightweight desktop environment that can be launched on devices with RAM 256 MB.
Lubuntu:

Like Linux Mint Xfce, Lubuntu is a worthy choice for computers relatively weak configuration. Lubuntu, based on the world's most popular Linux distribution in the Ubuntu and an incredibly easy desktop environment, maybe even, without jokes, run on Pentium processors 2. Of course, it is not necessary to have a weak computer to use Lubuntu. You can use it on the apparatus with normal indicators and enjoy just the space speed of the desktop.
Zorin OS:

Zorin OS is a new face in the world of Linux. Its main goal to bring Windows users in Linux. Zorin OS imitates the appearance of Windows 7 and the sensation from it, with the obvious purpose to provide maximum amenities former users Windows. Also in Ne. there is a change option external view On Windows XP. Zorin OS, equipped next to the default, is the ideal replacement of Windows XP on medium configuration computers.
Here is the list of 4 Alternatives to Windows XP from the world of Linux and approached the end. Obviously, it is not necessary to focus only on these four distributions. Go to the DistroWatch and pick it yourself as appropriate. As soon as you decide to go to Linux, remember that there are a lot of resources on the Internet and a community that can easily simplify you transition. Our site is only the sandstone in the ocean.
What OS, in your opinion, can it best replace Windows XP? What would you add to the list? Share your thoughts!
In the process, you will format a local disk on which the current version of Windows is located. Simply put, before installing there new systemYou will have to erase all the old data from it. The contents of the remaining disks should remain unchanged. But it is better to rebuild and pre-copy to the cloud or on the physical medium absolutely all data from the computer you are afraid to lose.
If the computer is installed paid programsdo not forget to read the rules for working with licenses in their documentation reinstalling WindowsOtherwise you can lose them.
2. Create a boot disk or flash drive
If you want to install / reinstall licensed windows versionMake sure you have a respective activation key. Even if you already use the activated system and just want to set the same version again, the old activation key can be useful again.
- If you already have a boot flash drive or a disk with the version of Windows you are going to install, you can go to step 3. Otherwise you need to download the Windows image from the Internet and record it on any of the above media according to the instructions shown below.
- Decide the version of Windows that you will install, and check that the computer meets its system requirements. This information can be found on the official Microsoft website or on the disk with purchased Windows. Do not forget to check that the computer supports the bit new version: 32 or 64 bits. To not guess, you can install the version with the same bit as your current version of Windows.
- To create a bootable flash drive with any way Windows found on the network, you can use the program (C uEFI support) and move to clause 3.
And below, I will tell you how to create a boot disk or flash drive with a formal system of the system on the example of Windows 10.

3. Load the system from the disk or flash drive
Now that you have a physical medium with in the right way Windows, you need to go to a special BIOS software environment and choose a disk or flash drive here as a download source.

Perhaps instead of a classic BIOS you will see a more modern graphical interface. In addition, even in various old versions of bios. Settings may differ. But in any case, the procedure will be approximately the same: go to the download menu, select the source you want and save the changes.
After that, the computer must boot from the selected disk or flash drive.
4. Run the installation wizard
 If you are all done correctly, the Windows Installation Wizard appears on the screen. Next steps do not exceed the complexity of the installation of ordinary office program. You can only follow the system prompts and wait until the files are unpacking. Is it necessary to choose a local disk to install the operating system and format it.
 In addition, in the process, be prepared to enter the activation key. But if you reinstall already activated on your windows Computer 10, the key with the key can be skipped.
After the installation is completed, the computer must boot in the usual operating mode.
5. Install drivers
 Softotor.net.
 Modern versions of Windows independently download drivers. But if, after reinstalling the system, you will notice that the video card, speakers or something else works incorrectly, you can use the utility to autoload drivers. It is suitable, for example, free Driver Booster.
After completing all the above, you can start work. The computer must be ready.
Greetings. Decided today to write about how to install windows xp. Just brought me a computer, so myself, old already. RAM 256 MB, Celeron processor, 40 GB hard drive. Well, what? That where there, XP for him is the most.
Just everyone is already writing about installing Windows 8, and I suffered something on the old days. Well, okay, I think that XP will still live, because it's not to twist a good OS and many still work with it. Immediately I want to apologize for the pictures, photographed on a 15 inches monitor, also on the phone. Ideally, of course, you could install Windows XP on a virtual machine and make beautiful screenshots, but I have a living example :).
Preparation for installing Windows XP
Important! Make sure that on the C disk (the disc on which you have installed or the operating system has been installed) there is no important information to you. Desktop and folder "My documents" It is stored on the C drive. If there is information, it can be copied to the D disk using the boot disk.
If everything is fine, then go further. Put the installation disk with Windows XP into the computer drive and restart the computer. Food after starting the download at the bottom of the screen you will see the download (points will move), then everything is fine. Quickly press any key (did not have time :), restart the computer again) and you can go to the start of the installation.
Well, if you did not go to download from the CD disc, and the computer started loaded as usual from the hard disk, or an error has appeared through which you have taken to reinstall the operating system, it means that you have no download from the drive in the first place. I already wrote an article about, but in this computer Bios was different from what was described in the article.
Go to the tab "BOOT".
Click " Boot Device. Priority.
Using the "Enter" and "top" "down" keys, set the first CD / DVD, then the hard disk, etc., is now pressing the F10 and save the changes. The computer will restart and boot a CD disc. Press any button and go to the beginning of the installation.
Windows XP installation process
Once you have pressed any key, we see this:
Here you have to wait, well, nothing can be done, waiting :).
In this window, click "Enter".
We accept the license agreement by pressing the F8 key.
As you can see, I have already found an old version of Windows XP and you can try to restore it, but I think you also need a clean installation, so we press "ESC".
Select a partition on the hard disk in which we want to install the operating system. As a rule, it's C:, choose it and press "ENTER".
Confirm the setting with the "C" key.
Here you need to choose how the section will be formatted. I advise you to choose in FAT and not fast. Click "Enter". Confirm the formatting by pressing the "F" key.
We wait until the partition on the hard disk is formatted.
Immediately copy files from the disk, we are waiting again :(.
You can immediately adjust the language and keyboard. Click "Next".
We introduce your name and name of the organization. Go ahead.
Configure time and date. Click "Next".
We are waiting again, just do not go away :).
I left "Ordinary parameters" And pressed "Next."
You can register with Microsoft. But I refused. We continue.
We specify user users.
Congratulations! Installing Windows XP completed.
All friends, the installation is completed and you can start using the computer. I also want to notice that I installed myself a simple assembly of Windows XP. You can also have an assembly for example from Zwer, there the installation process can be slightly different. For example, in this version, I also introduced the key, I forgot to take a picture. And in the assembly from ZWER such item seems to be no. Well, if the key asks, look for it in a text file, which you most likely downloaded a disk image.
Well, everything seems to be. Good luck friends!
Many users believe that the installation of operating systems on a computer is the prerogative of specialists. But is it really? Learning to install and reinstall Windows XP yourself.
It is no secret that human communication with the computer is carried out using the operating system installed on your PC. This is the primary and fundamental software component, without which it is impossible to submit modern computer. Unfortunately, like any other program, the operating system is imperfect, and over time, almost any user faces violation of its normal functionality. This can be expressed in a significant increase in the time of downloading the computer and open applications, hangs when working, the occurrence of various errors when performing certain actions or even in full failure of the system. Such consequences can lead both the incorrect actions of the user itself and the impact of various malicious programs available in excess in global Network The Internet.
According to statistics, even if you neatly exploited your OS and securely defended it from viral infection, after 3-4 years 80% of users have significant reasons for reinstalling the system. And if you still decided to do it yourself, not referring to all sorts of paid technical Services, This article is for you. In it, we will consider not just the complete installation of the WindowsXP3 operating system, but we will try to disassemble all the main nuances that occur during the installation process. This approach will allow not only more flexibly set up a new OS already at the stage of reinstallation, but also to avoid possible losses of important data.
Naturally, before installation, you need to have an installation disk with the system. Moreover, this disc should be bootable, i.e. the computer must be able to load from it. As a rule, all original discs with the system or their images are bootable by default. In general, the installation of WindowsXP can be launched in two ways - directly from the already installed system or through the download from the disk. The second method is preferable, well, if you have an old system not loading or you install on new computer, then the only possible.
In order for the computer to start booting from the mounting disk, it may be necessary to make simple settings in the BIOS. The fact is that your optical drive Must be the first in the list of boot devices, which is not always configured so. To check this, you need to insert a Windows CD into the drive and reboot the computer. If during the download process you will see an inscription: "Press any key to download", then everything is in order and can be started to install. Otherwise, you need to go to the BIOS setting.
Configuring a computer to boot from a CD
When you turn on the computer, as a rule, a short message appears, indicating that key with which you can go to the BIOS settings menu. Be careful because this inscription disappears from the screen quickly, especially in laptops. If it was not possible to see it from the first time, immediately reboot the computer using the RESET button and try again. At the time of starts, the download may appear large graphic imageClosing service inscriptions on the screen. To remove it, press the ESC key.
The list of the most common keys:
- Desktop computers - DEL (almost always), F1
- Laptops - F1, F2, F3, Del, Ctrl + Alt + Esc. In the case of laptops, the key combination can be very diverse, depending on its model. You can find this information either via the Internet, or by calling technical support.
Finding out the key that is responsible for calling the BIOS settings menu, restart the computer again and at the very beginning of the download, click on it several times (enough and one time, but to accurately catch the right moment, the repeated press does not prevent). If everything is done correctly, the settings window should open.
As a rule, two types of bios are most often found:

If your window looks like this, then you need to choose a section Advanced Bios Features., and in it item First Boot Device.assign a CDROM value. Then press the F10 key and select YES in the dialog box that appears.
American Megatrends Bios.

Or if your window has a gray background, like on this screenshot, then select the section from above Boot. and in the subsection Boot. Device.Priority. in point 1stBoot.Device.set the name of your optical drive. Then press the F10 key and select YES in the dialog box that appears.
Mobile devices (laptops), BIOS programs can vary very much, and lead to this article all possible options are not possible. In any case, you should find the item in the settings window, the name of which is associated with the download (BOOT) and set the optical drive (CDROM) in it.
Start of installation
After switching on / restarting the computer, if any Windows operating system is already installed on your computer, then after some time on the screen you will see the inscription "Press Any Key to Boot From CD" (press any key to download CD) What do you need to do?

Be careful, as you will have only 5 seconds to enter the installation of the system. If the current operating system is loaded, it means that the ability to start the installation was missed and reload the computer to the next attempt.
Then the basic installation screen will appear software Windows XP, requiring your intervention only if you plan to install a system for hard disk array (RAID) or a high-grade SCSI disk.

It is here that you should press the key to install additional drivers of these devices, managing messages at the bottom line of the screen. In most cases, such an intervention is not required and you should simply wait for the screen of greetings.

On the welcome screen you will be asked:
- Install Windows XP. You should choose by pressing the Enter key, in the case of new Installation or restore the previous copy of Windows using the graphical interface.
- Windows restoration With the help of the recovery console. Should be chosen experienced users To restore the system using DOS commands running from the command line. Allows you to eliminate minor system errors without passing the full installation procedure. Most often used to restore boot sector File System and Main boot record (MBR); point copying, renaming or removing folders and operating system files; creating and formatting sections on disks. Recovery console is called the R key.
- Output. In case of refusal of installation, press the F3 key.
Select the first item "Getting to install Windows XP" (even if you are going to reinstall the system) by pressing the Enter key, after which a window appears with a license agreement that needs to be taken to continue the installation by pressing F8.


If such is found, you will see the screen with the list of these systems and the menu in which it will be proposed:
- Restore the found copy of Windows by pressing the R key. Selecting this item, you will have to go through the full system installation procedure, during which all system files of the old copy are replaced with a new CD. All your data, settings and installed programs will be saved. Recovery helps in case of damage, delete or replacing infected files, Windows system files.
- Install a new copy of Windows by pressing the ESC key.
Window with a list installed systems You will not see if you install the system to a new computer / hard disk, as well as if the previous copy of Windows has a different edition or service pack.
The next step in the installation is the distribution of disk space under the operating system. This is very important moment And I should consider it carefully, and all actions perform very carefully.
Hard disk distribution rules
In this place I would like to make a slight digression and bring some useful recommendations By splitting the hard disk:
- Do not assign all the hard disk space for one single section. This is considered a bad tone and may in the future deliver a lot of trouble in the future.
- Modern hard drives There are quite large containers for storing data and therefore it is advisable to split them into several thematic sections.
- It is recommended for installing the operating system and the necessary software to divert a separate section and not to score it with your personal data.
- Select the size of the system partition should be with a margin, given that for Windows correct operation, 15% of this section should remain free.
- Do not create too many sections. This will complicate navigation and reduce the efficiency of the distribution of files and folders of large size.
Definition of system partition
Now, let's go back to the installation. From this point on, the installation of the installation can go in two ways:
Option 1: You have a new computer and hard drive has never been distributed. In this case, the following plan will appear before you:
.jpg)
The size of an unbelievable area is the volume of your hard disk and of course the coincidence with the specified in the screenshot should not. To continue the installation, you must create a swadder on the disk (system partition), which will be installed in the future, and specify its size. As a rule, for Windows XP and related software, it is enough 40 to 60 GB, but not less than 20 GB. By pressing the C key in the window that appears, enter the desired size of the generated section.

Size must be specified in megabytes. Calculate it based on the fact that 1 GB \u003d 1024 MB. Thus, if you want to stay under the system section 60 GB, in the size field, you must enter the number 61440.
By pressing the input key you will return to the hard disk breakup window, where the created section will be highlighted on a separate line With the assigned letter from the Latin alphabet (as a rule "C"), the file system - in our case, "new (unformatted)" and its size. Below will be the string with the remaining non-distributed area, which you can smash the number of sections in the same way. True, here it is not necessary to do this, since after installation it can be done by Windows.
By creating a system partition, select it using the arrow on the keyboard and press the Enter key, after which you will see the last dialog box in which you will be asked to format it.

Boldly choose a quick format version by pressing the input, since in the second case, the physical surface of the disk is checked, which takes pretty long timeMoreover, if the section has a large size.
After selecting the file system, Windows installation will start directly.
Option 2 - If the system has been installed on your computer.Then your hard disk has already been distributed to the logical areas, and you will see the window with the listing of all the sections found.

Attention! All further manipulations with the found partitions can lead to the loss of your data, so be very accurate in your actions. If the current partitioning of the hard disk does not suit you, you can delete the existing partitions in whole or in part by pressing the d key. The selection of the desired partition is carried out using the up and down arrow keys. After deleting the partition, the area that it occupied becomes unbalanced, and all the data on this logical disk are removed. When removing several partitions, they turn into a single unintended area that in the future you can distribute how you wish. The principle of the distribution of the unintended portion of the hard disk is described above.
After all redistribution or if the existing hard disk structure suits you, you can only select the desired section in which you plan to install the system and press the Enter key.

If you have already selected the previously existing data section with existing data that has previously existed earlier, you will be asked to choose a few options, how to do further. Caution, the formatting of the partition in any file system will lead to the loss of data that were in it! The FAT system is obsolete and formatting makes sense to produce only in NTFS (rapid preferable). By choosing, press the input to format and copy system files to start formatting and copying system files.

If for some reason you still want to save the information located in the section you selected, then you should select the "Leave the current file System without changes". In this case, all the data on it will not be touched. Moreover, if in this section, a previous copy of Windows was installed (most likely option), then in this case the installer will be issued to you a warning that the "Windows" folder already exists, offering either to sweat the existing copy by clicking, or select a new folder for Installations. Here we definitely press, since the old folder with the system will be renamed automatically and saved.
It should be noted that after such an installation, it is categorically recommended to manually clean your system partition, namely the removal of a large number of files duplicating each other. The fact is that Windows installer will not only save old copy Systems, but all the files that existed in it are accounts. From this all good for you it is possible to use the "My Documents" folder, "Favorites" and "Desk". Everything else will be useless trash engaged in gigabytes of a hard disk space. That is why it is preferable to take care of saving your data in advance, and the new system is installed in a clean partition, pre-formatted.
On this branching of the installer ends, and the further installation passes linearly. After selecting the hard disk partition to install the new operating system, copying the main system files of Windows.

Upon completion of the copy, there will be a reboot of the computer, where you do not need to do anything, but only wait for the advent of the installer screen already with a graphic shell.
Determining the initial pavements of Windows

In this window, you can change regional settings and input language. By default, Russia and Russian language is already installed as a location. So, no need to change anything to change, click "Next."
In the next window, you must enter the username (your name) and the organization (optional). Click "Next".

To continue the installation in the key input window, you must enter serial number WindowsClizenzion stickers.


In the Time and Date Settings window, it is most likely to change anything either, since the correct data will be entered automatically, and you will only be left to click on the "Next" button.

The following two windows you will see only if the driver for your driver is contained in the WindowsXP distribution network card.

Here you should not change anything, leaving the selected option "Ordinary parameters", however, as in the following, where the name of the working group / domain is more advisable to choose after installation.

After pressing the "Next" button, the final phase of the installation will begin, and you will only remain just waiting for its end. After a few minutes there will be an automatic reboot of the computer, after which the first launch of the new operating system will begin.
Finishing installation
When you start the Windows, you will see a few more dialog boxes. The first of these will be "screen parameters", where you just need to click "OK".

After automatically configuring the screen resolution, Windows will contact you to confirm them, which should be done by clicking "OK":

There is nothing to customize the welcome screen, so just press "Next":

The next step will be the ability to select automatic parameters windows updatesIntended to regularly check through the Internet network, the presence of all kinds of security fixes of the system, critical updates and service packs on the official technical support website. The inclusion of automatic update is desirable, but at this stage it is optional, since you can perform a more flexible setting of this parameter after installation from the control panel.

If during the installation, the network card drivers were installed, you will see two more windows: the first - check and settings for connecting to the Internet, which is worth skipping and second - registration of the system, which is also better to postpone on then.


The last parameter that you have to enter for the final boot of Windows will be the name account User under which you will work in the system.

At the end, you will see a window that communicates about the end of the operating system installation.


Full installation of Windows XP can occupy from 15 to 35 minutes and depends on the power of your computer. Immediately after its completion, you should install all the necessary drivers of installed devices, after which you can start installing software.